When it comes to measuring the success and the performance of your website, especially for the purposes of inbound marketing efforts, Google Analytics is definitely your best bet. This powerful tool is free and easy to set up and use. Even inserting the tracking code is way simpler than it seems. More importantly, Google Analytics is accessible to everyone and quite valuable in terms of insights.
Still, a surprising number of people fail to use Google Analytics properly and get the most from this important tool. A lot of us simply skim the results and rarely go below the surface of vanity metrics such as how many people have visited the site.
Latest 10+ Tips and Tricks To Get The Most From Google Analytics 2024

That’s a huge mistake since we can learn so much more from Google Analytics. Here are a few tricks that should help you dig deeper and get valuable insights on how, where from, when and why people are visiting your profile.
- Create Goals
Although Goals are one of the basic, and the simplest features of Google Analytics, a lot of us just fail to use them properly, or at all. You can choose from a number of templates but, for most websites, the conversion is the most important metric and hence the most commonly used goal. By setting conversions as the goal, we are able to monitor and check this important KPI quickly and easily.

In Google Analytics, there are four ways to track goals:
- URL Destination. This goal keeps track of specific URLs – each time that URL is visited, it triggers the goal. This sort of goal is particularly suitable for thank-you pages, PDFs, confirmation pages, and such.
- Visit Duration. This goal tracks how many people stay on your site for a specified period of time. Also, it can be set to track all visits that lasted less than the specified amount of time. This feature is great for support sites where the goal is to resolve a customer’s issue as fast as possible.
- Page/Visit. These goals are similar to tracking visit duration, except they track the number of pages a user visits before leaving the site. Again, this is ideal for support sites, for obvious reasons.
- Event. With these goals, you have to set your events first. It can be anything, from clicks on ads, downloads, external links, clicks on videos, time spent watching videos, widget usage, social button clicks and so on. An event is basically any interaction your visitor has with your content.

Goals are vital elements for tracking the essential metrics of your site. You want your metrics to come as close to what generates revenue.
Things that you should definitely be tracking include:
- Leads
- Newsletter and trial signups
- Ebook and white paper downloads
- Created accounts
- and anything else that generates revenue for your particular website.
- Pick Your KPIs
Speaking of KPIs (Key Performance Indicators), while conversion is the most important one for most businesses – we all try to convert visitors into buyers of one kind or another – there are other indicators to watch for as well. For instance, the most important KPIs for marketers are number of leads and lead quality, for ecommerce websites it’s the sales conversion rate, number of purchases, revenue and so on. Map your KPIs and set your Google Analytics goals accordingly.
The key to a successful strategy is to define your KPIs properly. Of course, this probably seems easier said than done if you’re just starting out. However, these four simple guidelines can make the job easier:
- Remember that KPIs vary and change. They are not the same for all businesses, and they even change and grow within one company as the company itself changes and grows. To make sure you focus on the right KPIs, always keep in mind 1) your business model and 2) your current growth stage.
There are three main types of KPIs:
- Overall business KPIs
- Department/Team KPIs
- Individual KPIs
- Limit the number of KPIs. In addition to one overall KPI, the number of your KPIs should be limited, so that your team can stay focused and reach the goal faster. Too many KPIs may cause scattered attention and poorer overall results.
- Use the IPA rule. In this acronym, I stands for Important (“Is this KPI important?”), P stands for Potential improvement (“Can this KPI get better?”) and A is for Authority (“Do you have the authority or the means to improve this KPI?”).
Now, obviously, the KPIs are not universal. They depend on your industry or niche. For instance, some of the essential KPIs for small businesses may include:
- Cash flow forecast
- Gross Profit Margin as a % of sales
- Funnel drop-off rate
- Revenue growth
- Inventory turnover
- Accounts payable turnover
- Relative market share.
For other business websites, these metrics will probably be different, but again, not that different. Using the guidelines provided above, you should be able to define your KPIs quite easily.
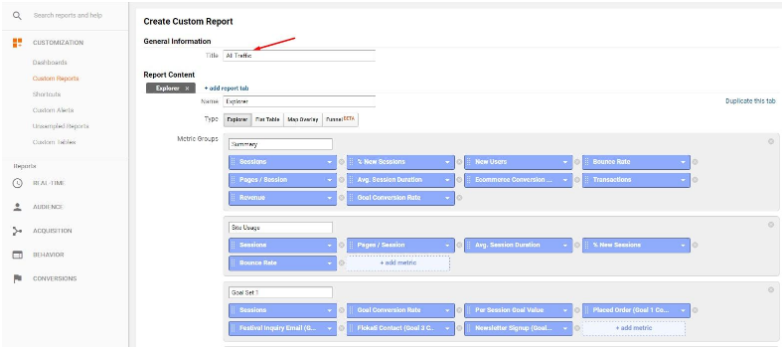
- Create a Custom Dashboard
Did you know you can create up to 20 Google Analytics dashboards? Dashboards are useful because they allow us to quickly access our valuable analytics data and we can create one for each of our defined KPIs. Plus, Google Analytics has dashboard templates that are quite useful, as well as custom reports. All this helps you get precisely the data you need without losing precious time.
To create a dashboard, you’ll obviously first need to log into your Google Analytics account. Next, navigate to Customization>Dashboards. From there, click on the red button that says Create.
You will now see a pop-up with two options: Blank Canvas (a template without any widgets) and Starter Dashboard (including a default set of starter widgets – recommended for your first custom dashboard).
Don’t forget to give your dashboard a name, especially if you plan on creating more of them. Finally, click on Create Dashboard.
If you follow our recommendation and use the Starter Dashboard, you will have the following widgets:
- New Users
- Users
- Sessions
- Sessions by Browser
- Average Session Duration and Pages/Session
- Bounce Rate
- Goal Completions
- Revenue
Now, if you want a truly custom dashboard, you can opt for the Blank Canvas option. When you select this option, a pop-up offering a number of widgets you can add to your dashboard. For instance, you can add one or more of these:
- Metric
- Timeline
- Geomap
- Table
- Pie
- Bar.
To add a widget, simply click on it and give it a name. Next, tell Google Analytics which precise kind of data to collect. For example, if you add the Metrics widget, and name it Users, you may want to track New Sessions only. You can also add filters.
When you’re done setting up your widget, simply click on Save.

- Segment Your Audience
A lot of websites actually have several different target audiences, so it’s important that your metrics reflect those differences. Google Analytics has the Advanced Segments feature that you can use to define different groups based on criteria such as age, gender, language, user behavior, traffic sources, the technology used, location and so on.
To add an advanced segment, log into your Google Analytics account to Audience>Overview and click on +Add Segment.
From here, click on the red button that says +New Segment.
Next, name your segment and choose one of the following visitor segmentation criteria:
- Demographics
- Technology
- Behavior
- Date of First Visit
- Traffic Sources.
Now, you can further customize this segmentation. Let’s say, for example, you want to customize the Behavior. Here, you can segment your visitors based on the number of sessions they have started within a set period of time.
After you have set everything the way you want, you can click on Preview. If you’re happy with what you see, click on Save, and that’s pretty much it.

- Review Reports Regularly
What’s the point of using analytics tools if you’re not going to pay proper attention to the reports? Your main KPIs should be reviewed at least weekly and go through a thorough report on all data at least once per month.
Even more importantly, you should act according to what the reports have shown. The purpose of reports is for you to see how well your site is performing and how close you are to reaching your short, mid and long-term goals. Therefore, every report should be followed by action. Actionable insights are one of the things that make Google Analytics such an incredibly useful tool, so make sure to use that.
- Analyze Site Searches
If your website has the search function enabled, you should definitely look at Site Search option of Google Analytics to find out what your visitors are searching for. Visitors who perform searches are more likely to convert so you definitely want to find out what they’re searching for. With that sort of insight, you can then publish the content they’re looking for and ultimately increase your conversion rate.
To set up Site Search in Google Analytics, log into your account and click on Admin. Now, navigate to the view in which you want to set up Site Search.
From there, go to View Settings. Under Site Search Settings, click on the slider next to where it says Site Search Tracking to turn it ON.
You will now see the Query Parameter field, where you will enter your internal query parameters. If you don’t know what they are for your site, your best bet is to contact your webmaster. Enter up to five parameters, separated by commas.
Next, select whether or not you want the query parameter to be stripped from your URL, which only strips the parameters provided by yourself.
Your next step is to turn the Site search categories on or off. Search categories allow for refined searches, so if you have that enabled, click on ON. If you select OFF, you’re finished setting up Site Searches and all you need to do is click on Save.
If you select ON for Site search categories, in the Category parameter field, enter the designations of your internal search categories, which may consist of letters, such as ‘cat,qc,sc’. Finally, select whether you want your category parameters to be stripped from the URL or not.
Finally, click on Save and you’re good to go.
- Explore Primary and Secondary Dimensions
Another neglected Google Analytics feature is the ability to change the primary dimensions of a report. Additional or secondary dimensions allow you to dig even deeper and get even more data than what you get from your regular reports. With secondary dimensions, you can customize your reports so that they enable cross-referencing with different data points. Plus, you get to save shortcuts for all customized reports, which saves a lot of time.
Dimensions are a bit tricky to define. A simple way of putting it might be that the primary dimension represents the main focus and the secondary dimensions provide additional insight that gives us a more specific view of our data.
To add a secondary dimension to a table in your report, click on Secondary dimension below the list of primary dimensions. Here you can either browse the dimensions and select the one you want to add as secondary, or type in the name of the desired dimension in the search field.
Quick Links:
How To Optimize Old Articles For Google Featured Snippets 2024
What Are The Updates On Google Ranking Factors For 2024?
[Latest] Top Best Google AdSense Plugins For WordPress April 2024
How to Install Google Analytics In WordPress | 3 Best Working Methods
8 Easy Steps to Configure and Use Google Analytics
Redtrack Alternatives
- Compare to Past Performance
The default results display in Google Analytics is 30 days but you can change this to any time range you want. This allows you to compare how you’re doing now with how you did, say, three months ago. Comparing current results with historical data is essential as you want to see changes in areas that matter. KPIs alone don’t reveal that much without this sort of comparison. This is particularly true for insights performed after major changes have been implemented.
The date range selector can be found in the top-right corner of your reports, except, of course, for your real-time reports. Open the controls next to an existing date range to select a new one, and then click on Apply.
You can also use predefined ranges, by clicking on the Date Range menu and selecting one of the following:
- Custom
- Today
- Yesterday
- Last Week
- Last Month.
You can also opt for a custom date range by selecting Custom from the Date Range menu. from here, to select a single date, click on any date of the calendar or enter a single date in both Date Range fields in mm/dd/yyyy format.
To select a date range, click on the start date in the calendar, and then on the end date. Selected days will be highlighted. Alternatively, add these in the Date Range field, as above.
To compare two different date ranges, select the Compare to Past and use the controls to set the second date range. After selecting the new date range, click on Apply and that’s it.

- Use Filters
You don’t want to be tracking your own user behavior on your site, would you? That’s precisely what’s going to happen if you don’t apply proper filters. We spend a lot of time on our own websites (along with our team members) checking if everything is working properly. Those visits, naturally, get tracked and analyzed together with other visits that are actually relevant. To avoid this, use Filters to exclude your IP address, including your home and office IPs and those of your coworkers.
Google Analytics offers the following predefined filters:
- Exclude/Include only traffic from the ISP domain
- Exclude/Include only traffic from the IP addresses
- Exclude/Include only traffic to the subdirectories
- Exclude/Include only traffic to the hostname
As for the custom filters, they are available too and include the following:
- Exclude
- Include
- Lowercase/Uppercase
- Search and Replace
- Advanced (create a field from one or two other fields).
Note that only the users with Edit Permission can create and edit filters and apply them to views in the account.
At the account level, filters are created by logging into your account and navigating to the account in which you want to add a filter. Click on All Filters in the Account column, click on +New Filter and select Create New Filter. Enter the desired filter name, and then select either Predefined filter or Custom filter. In the Available views list, select the views to which to apply the filter and click on Add. Finally, click on Save.
As for adding the filters on the view level, go to the View column, click on Filters, +New Filter and follow the same steps as above.
- Use Intelligence Alerts
Analytics Intelligence is a useful tool that often uncovers issues we may have missed, as well as opportunities. One way to make the best use of it is to set up custom alerts, as well as to sign up for the default ones. Note, however, that you can never rely solely on Intelligence and that it cannot replace regular report reviews. The two combined, however, represent an immensely useful strategy for making the most out of Google Analytics.
To create custom alerts, log into your Google Analytics account and go to the view to which you want to add alerts. From there, go to Reports>CUSTOMIZATION>Custom Alerts. Click on Manage custom alerts and then on +NEW ALERT.
Give your alert a name, select the reporting views to which you want to add the alert, the period, and if you want to receive email notifications, check the box that says Send me an email when this alert triggers. Pick the alert conditions and complete the action by clicking on Save Alert.
- Look for Updates
Just like your themes and your plugins, Google Analytics keeps updating too. Sometimes those updates bring incredible new features that you don’t want to sleep on and should use right away. The best way to keep track of updates is to follow the official Google Analytics Twitter account where this info gets posted.
The tricks and tips mentioned here represent only a tiny little bit of Google Analytics’ vast possibilities. Make sure to put them to good use and keep exploring the features that this amazing tool offers.