In this post, I have featured Wp Simple Pay Review 2024 that includes detailed insights of its pricing, features, functionality and more. WP Simple Pay is an independent Stripe Checkout plugin that is built by Sandhills Development. There is no need for complex shopping carts, form builders or membership for payments or subscriptions. WP Simple Pay has got you for all.
Let’s get started here with WP Simple Pay Review 2024 #1 Stripe Payments Plugin.

WP Simple Review: Should You Go For It?? (MUST READ)
Detailed WP Simple Pay Review
The Idea of WP Simple Pay is fabricated in 2014 by Phil Derksen. He set a goal to create a WordPress plugin that let site owners start accepting credit card payments and subscriptions with Stripe as quick as possible. After that, his missions are to leverage the valuable services and tools Stripe provides while keeping the plugin very trivial, no other dependencies, and easy to install and configure as fast as possible.

WP Simple Pay joined Sandhills Development in 2018. To sell digital products and adding an affiliate program, people needs to evolve e-commerce and require a fully-featured system. With the help of WP Simple Pay, people can easily solve this kind of problem. With this software, your e-commerce should be up and running in minutes.
Key Features of WP Simple Pay
- Payment Form Drag & Drop Builder
In this section of WP Simple Pay, you will get Drag & Drop feature to add a custom amount entry, a coupon code field, different custom field types, subscription plan section, a total amount label, and other options.
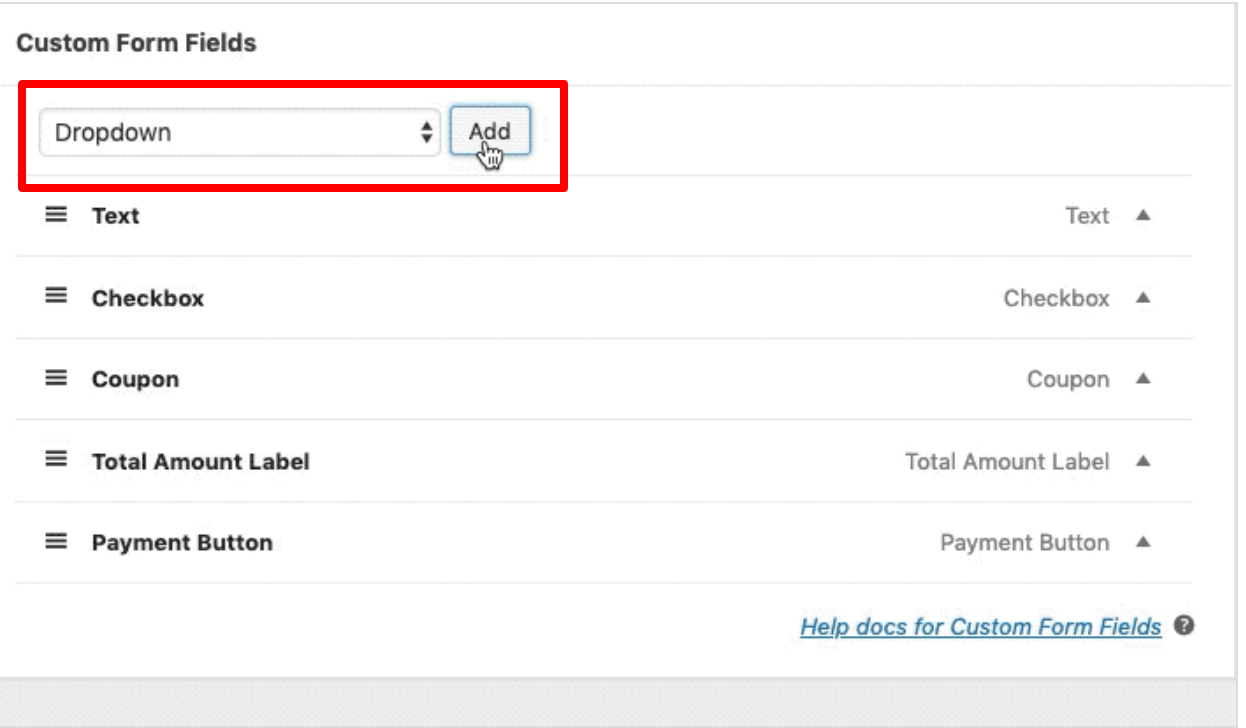
The data you have entered into these custom fields are stored as ‘Metadata’. You will get each Stripe payment record within your Stripe dashboard. In this section, everything is viewable alongside all payment or subscription plan data.
3 Form Display Types
In this section you will get 3 types of payment form displays:
- Embedded Form Display: You have full control over all form fields with Embedded form display option.
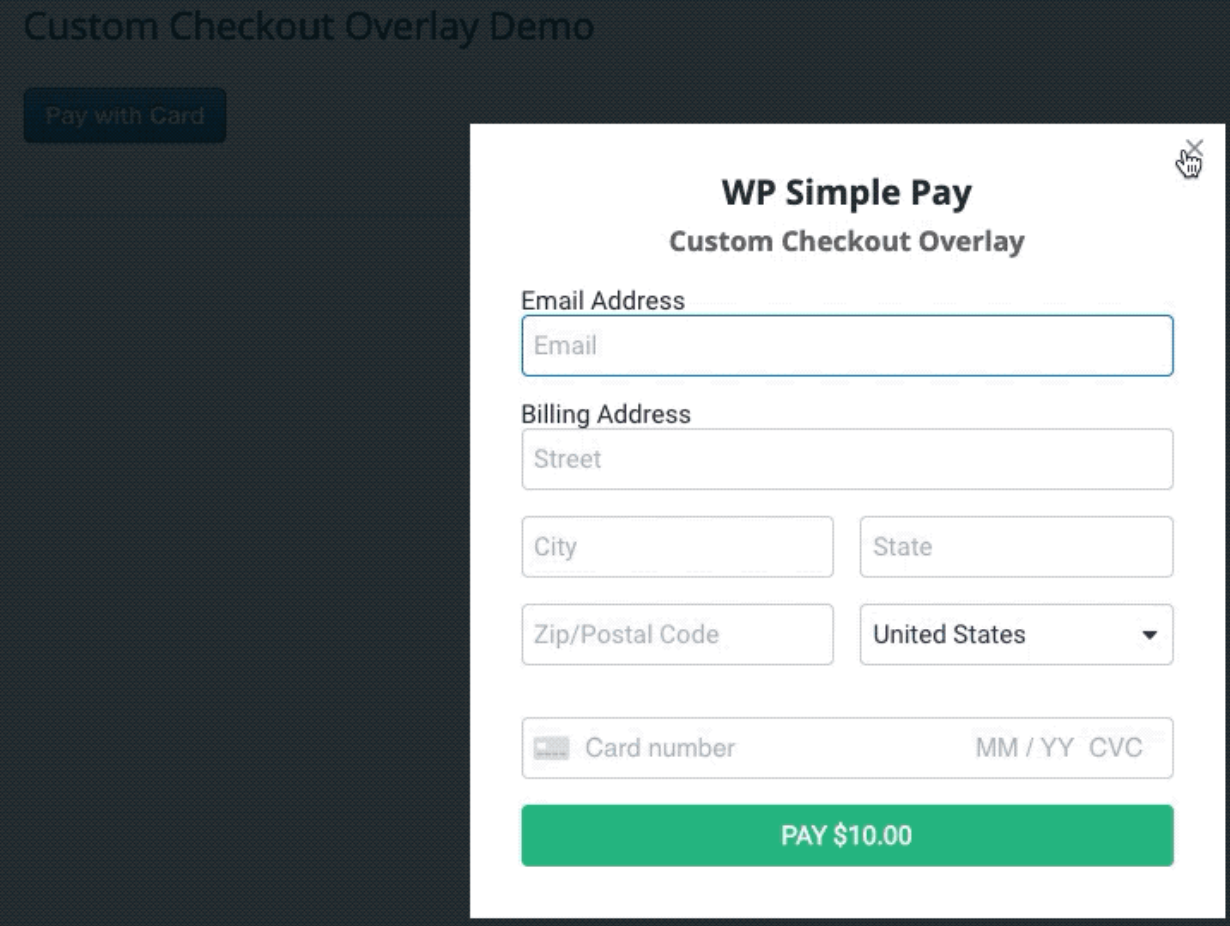
- Overlay Form Display: Like Embedded form display you will also have full control over all form fields with Overlay form display option.
- Stripe Checkout: You can add many types of custom fields to the on-page payment form to the Stripe Checkout page. This page cannot be customized because it is controlled by Stripe.
Stripe Checkout Payment Pages
You don’t need an overlay payment form if you need only minimal payment form customizations, you can utilize Stripe’s checkout pages for payment. In September 2019, the ‘legacy’ Stripe Checkout overlay has been replaced by the newer Stripe Checkout.

While you are using Stripe Checkout, you can set a few options. But once this option is selected, Stripe controls what can and cannot be configured on the checkout page as it is served up by Stripe’s servers.
Allow Custom Amount Payments
In this section, you can set a one-time amount or let your visitors pay what they want which can be useful for donations. This is also the fastest way to set up a generic payment form to direct variable-priced to the clients.
Add and Customize Subscription Options
You can connect a payment option to a single Stripe plan or let site visitors pick a plan to subscribe to. You can charge a setup fee, add a custom amount option or tie into free trials.
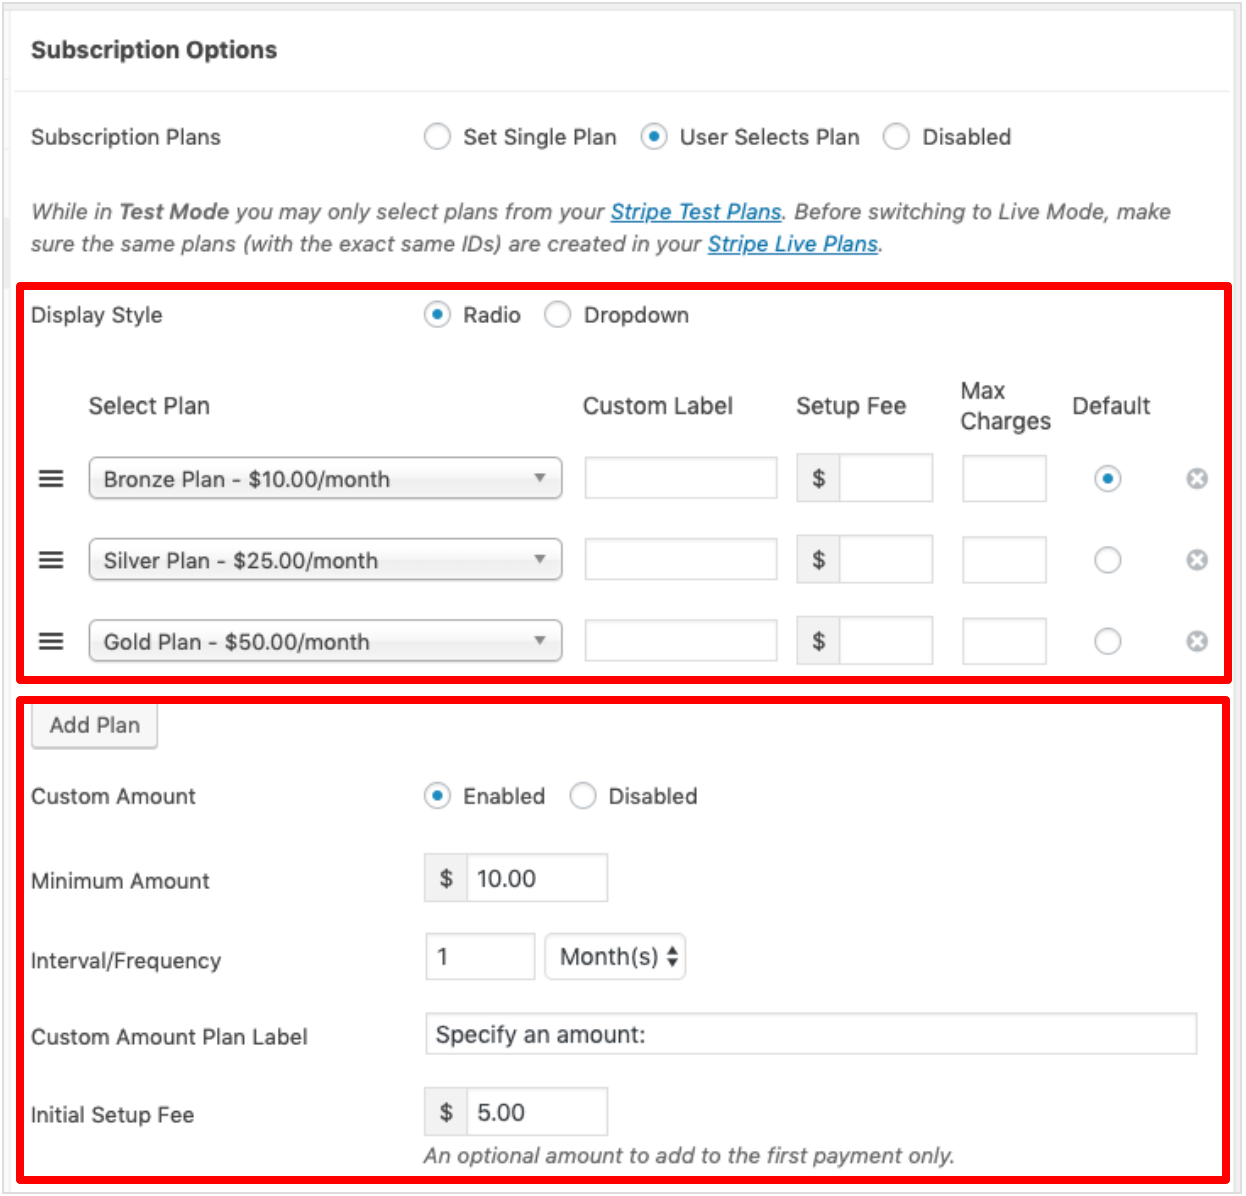
You can set these type subscription demos:
- You can set single plans and add custom fields so that you can offer your customers various ways to sign up for recurring plans.
- You can allow your customer or donor to enter regular custom amount.
- You can charge your customers a one-time setup fee in addition or sign them up for a time-limited free trial.
(You can end plans subscriptions after a specific number of charges)
Offer Discounts with Coupon Codes
You can add percent or amount off coupon codes to your Stripe dashboard so it can be used in your payment forms. (Stripe allows discount coupons)
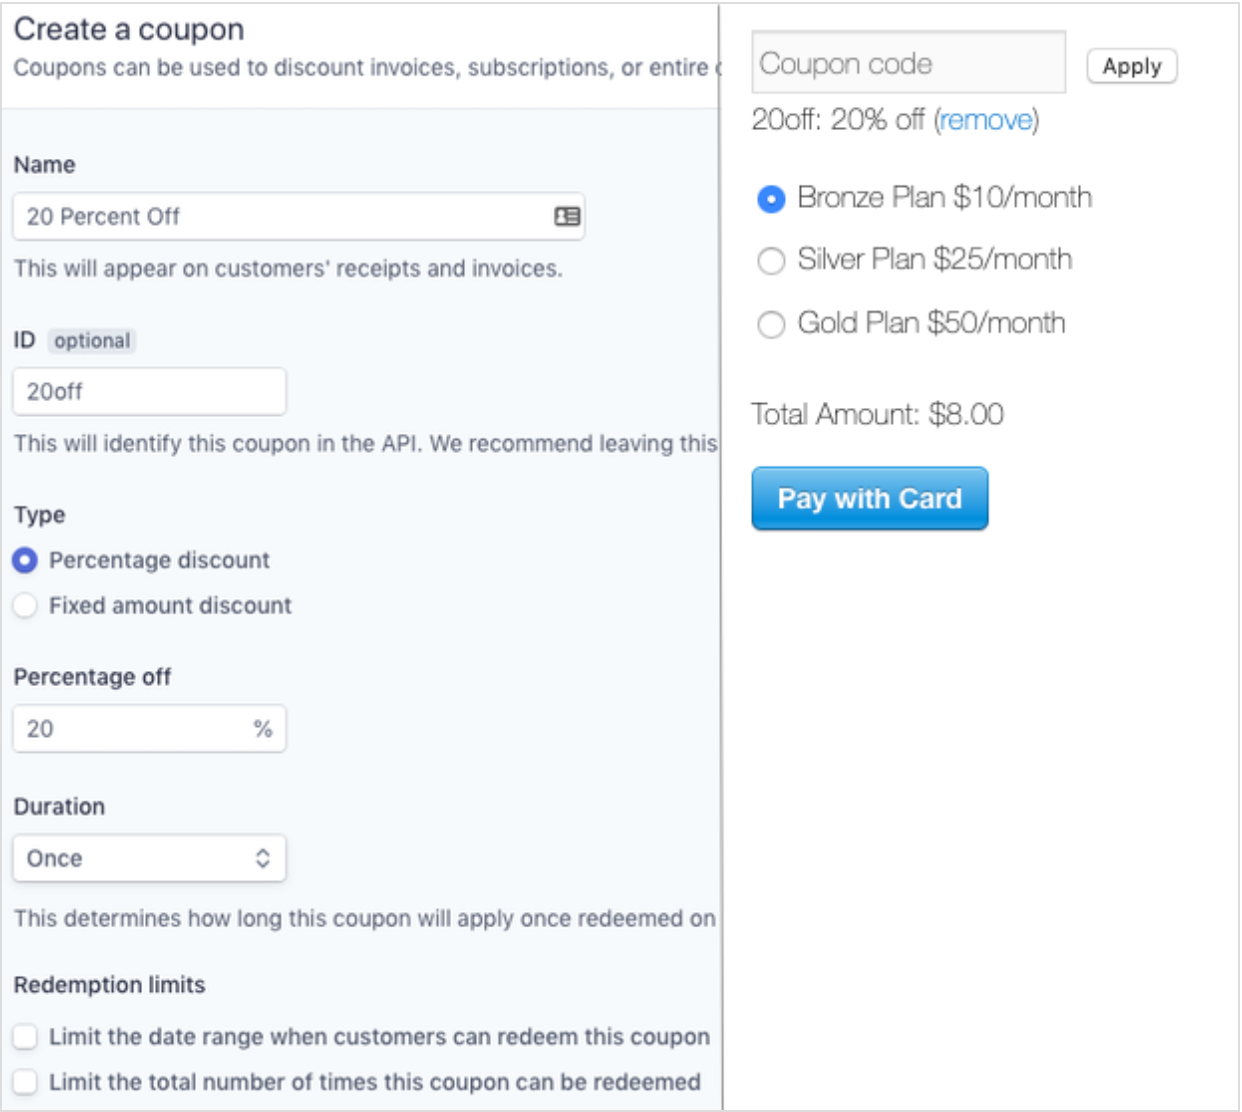
Stripe may be used with subscriptions but you can use coupon codes to let your customers apply a discount in your one-time payment forms as well.
Add Apple Pay and Google Pay Buttons
You can customize your site with smooth pay options so that your site visitors can pay using Apple Pay, Google Pay, and Microsoft Pay with a single button if their browser and device combination supports it.

WP Simple Pay now supported browsers included Chrome Desktop, Chrome Android, macOS Safari, iOS Safari, and Microsoft Edge.
Customized Payment Confirmation Details
WP Simple Pay offers many powerful features to fit your needs. So you can easily customize the payment confirmation details to see the post editor using placeholder tags.
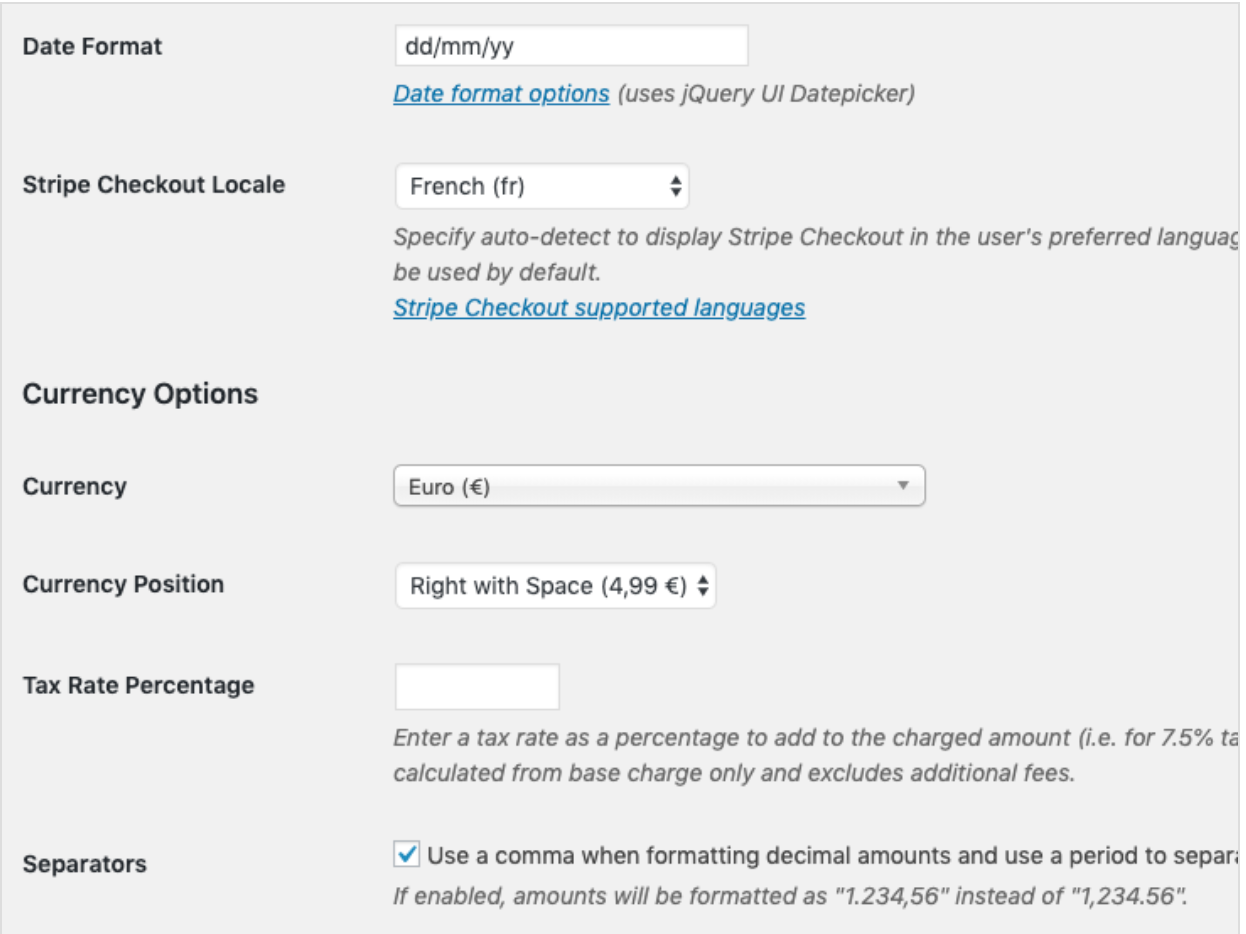
Locale and Currency Settings
For customers, comfort Stripe now supports 14 languages, 30+ countries and 135+ currencies. With WP Simple Pay you can set the languages for your payment forms as well as the preferred currency and date formats for your site’s region.
How to Install WP Simple Pay
Uploading the plugin through your WordPress admin area is the easiest way to install WP Simple Pay. But here I will show you how to manually install it via FTP upload as well. (Before installing WP Simple Pay make sure you have SSL enabled unless it is a pure test site)
1) Direct Upload
- For Direct Upload you’ll need to download the WP Simple Pay Pro plugin zip file from your purchase email receipt or from your WP Simple Pay account.
- After clicking the download link it will initiate a download of the plugin zip file to your computer. (Some browsers like Safari on Mac automatically extract zip files sometimes. If this happens, you just have ‘Download Linked File As…’ which will allow you to download it as a zip file)
- Once the plugin zip file is saved to computer, just log in to the WordPress admin of the site you want to install WP Simple Pay Pro on.
- Now go to the Plugin > Add New then click Upload Plugin.
- On the next screen you will see Choose File button, click this and choose the WP Simple Pay Pro zip file, then click Install Now.
- Once the installation process is finished WordPress should install a plugin for you and you will see an Activate Plugin button. Click this button to continue further.
- You should be taken to a page that lists all your plugin with a Plugin Activated message at the top once the plugin activation process is completed.
- You should have your WP Simple Pay Pro license key if you want to receive plugin updates and support.
2) Upload via FTP
Install WP Simple Pay Pro plugin manually or simply follow these steps.
- Download the WP Simple Pay Pro plugin zip file from your purchase email receipt or from your WP Simple Pay account.
- Extract the download zip file on your computer then you will see a wp-simple-pay-pro folder.
- Using an FTP/SFTP like FileZilla, Cyberduck or Transmit, connect your WordPress site.
- Drag the wp-content/plugins folder on your site. Now upload your wp-simple-pay-pro folder to this folder. (Remove its contents before uploading if you are upgrading and the folder already exists.)
- Click on Plugins to view your site’s plugin listing in your WordPress admin.
- Here you will WP Simple Pay Pro and now click Activate link.
- Once the plugin activation process is complete, you’ll need to activate your license key in order to receive plugin updates and support.
Activate Your WP Simple Pay Pro License
After installing WP Simple Pay Pro, you’ll need to enter and activate the license key in order to receive plugin updates and support. You’ll find your license key in your purchase email receipt or your WP simple Pay account. Simply copy the license key for the further process.
- Log in to your WordPress admin then go to Simple Pay Pro > Settings and paste your license key into the field on the License tab.
- Now click Activate to finalize license key verification and activation for this site.
Once activation is completed you can see updates for WP Simple Pay Pro as they become available within your WordPress admin. You can repeat this process for additional sites as your license type permits if necessary.
WP Simple Pay Stripe Setup
After installing WP Simple Pay Pro and activation of your license, you’ll need to set your Stripe API keys. If you don’t have any Stripe account then you need to sign up for a free account at Stripe.com.
- Open your WordPress admin and go to Simple Pay > Settings > Stripe Setup. Now click on the ‘Connect with Stripe’ button to WP Simple Pay to your Stripe account.
- Now you’ll be taken to the Stripe official website where you can create a new Stripe account or log in to your existing account.
- Once the login process is completed you’ll be taken to your site’s Stripe Setup tab and on the same tab is the Test mode toggle. (You have to stay in Test mode until you have completed setting up your payment forms.)
Once the setup is completed you can create your first payment form.
Manual Setup
(You can totally skip this process if you have already connected to your Stripe account using ‘Connect with Stripe’.)
- The first step is, log in to your Stripe Dashboard and select Developers from the menu.
- Now select API Keys from the menu. (Make sure that View Test Data is toggled on.)
- Open up a new browser tab and log in to your WordPress admin and go to Simple Pay > Settings > Stripe Setup.
- You’ll find Connection Status in order to manage API Keys manually.
- Now you need to copy and paste 4 Stripe API keys from your Stripe dashboard to your WP Simple Pay Pro settings.
- Go back to the Stripe dashboard tab, start by copying your Publishable key, switching to your WP Simple Pay tab, and pasting keys into the appropriate text box.
- Do the same process for the Secret Key.
- Go back to your Stripe dashboard, switch off the ‘View Test Data’ and switch to the Live mode, and repeat the above process for your live keys.
- Once the process is done, click the Save Changes and your Stripe setup is done.
Disconnecting from your Stripe Account
If you want to disconnect from your Stripe account or want to connect to a different Stripe account, simply go to your WordPress admin and go to Simple Pay > Settings > Stripe Setup. Here you’ll find Connection Status. Here you’ll find Disconnect this account. Simply click this button and your Stripe account will be disconnected.
Customer Support
Besides their extensive documentation and updates, if you are facing any kind of problems then their friendly staff is always ready to help you. You can contact customer support through their contact page.
Pricing Plan Of WP Simple Pay
WP Simple Pay has 4 different types of pricing plans with extreme features. Unfortunately, there are no free trial versions available. So let’s check out what’s the pricing plans are being offered by this platform.
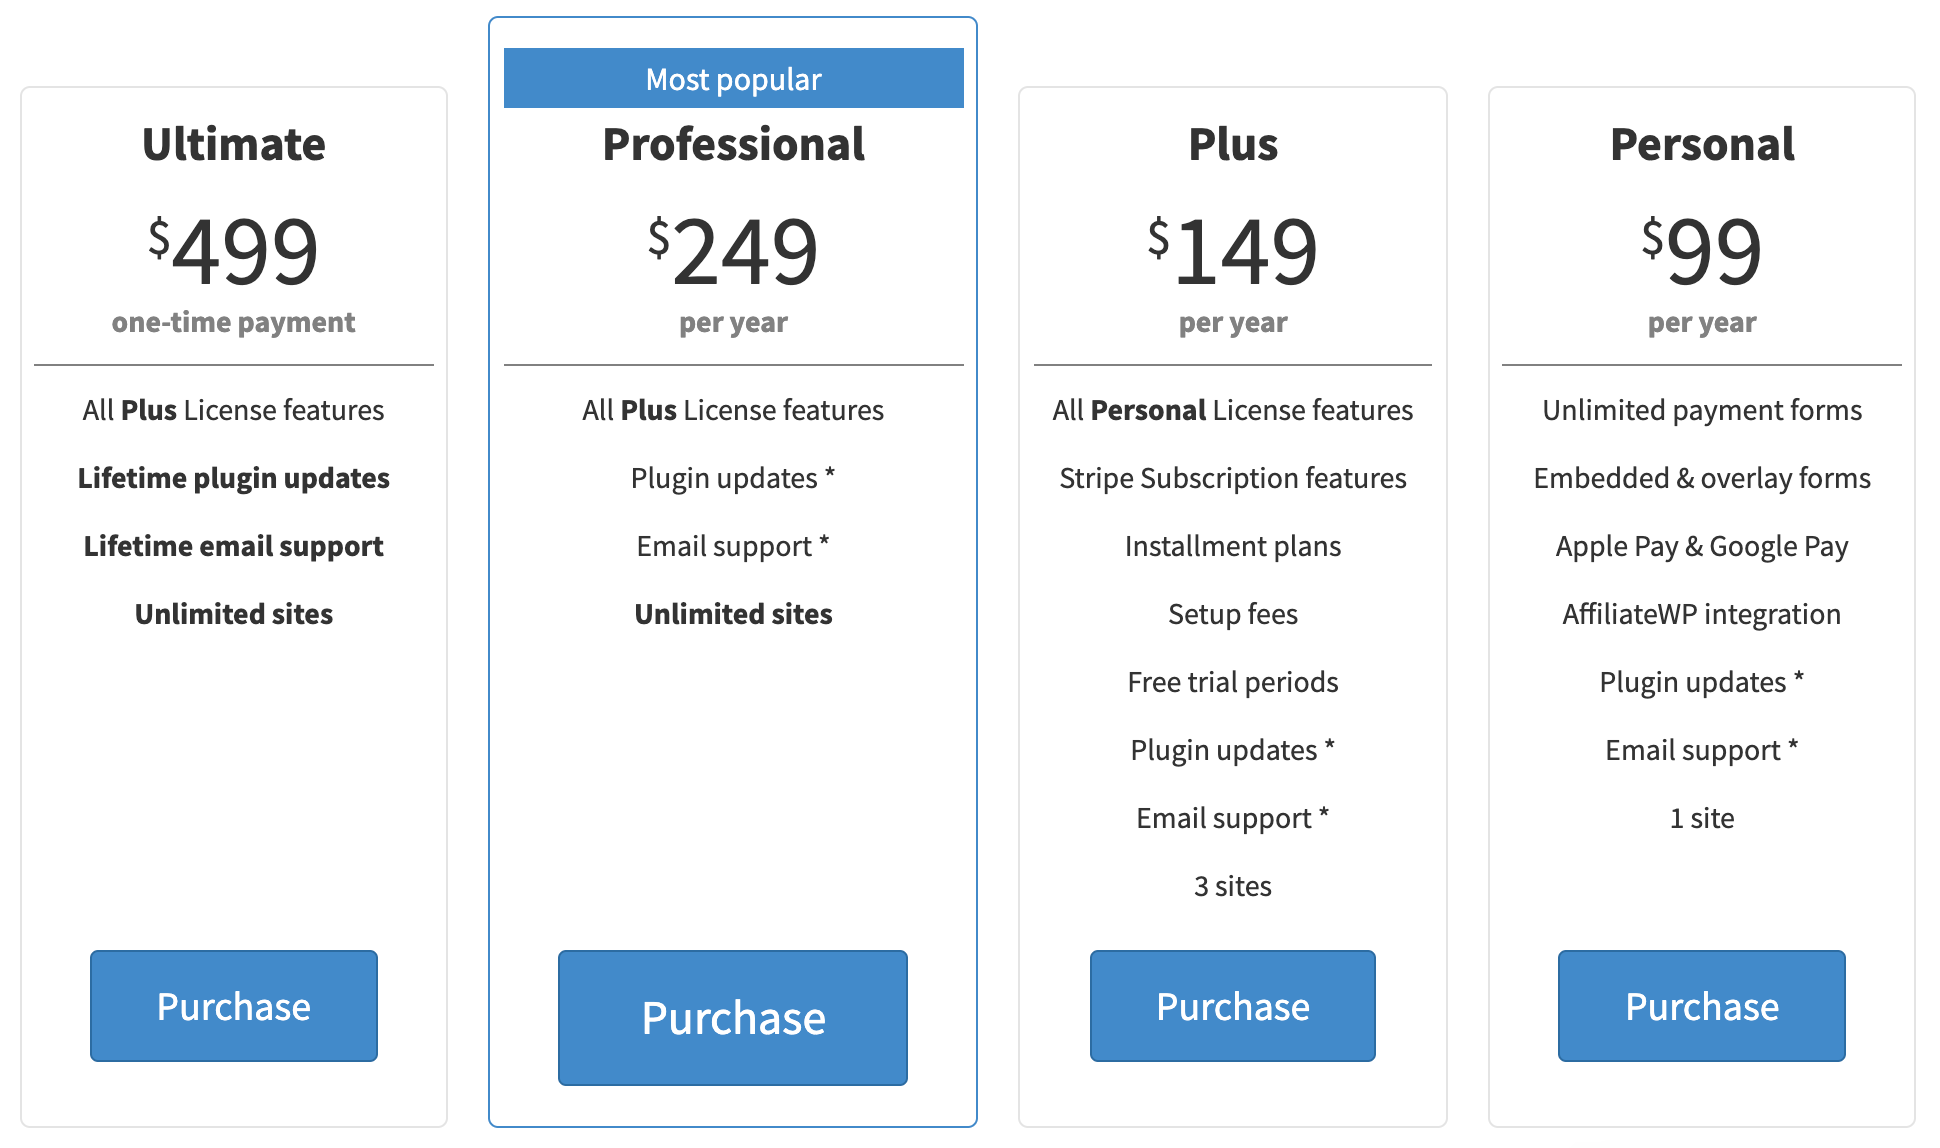
1) Personal: $99 per year
With this plan, you will get
- Unlimited payment forms
- Embedded & overlay forms
- Apple Pay & Google Pay
- AffiliateWP integration
- Plugin updates
- Email support
- 1 site
2) Plus: $149 per year
With this plan you will get
- All Personal plan features
- Stripe Subscription features
- Installment plans
- Setup fees
- Free trial periods
- Plugin updates
- Email support
- 3 sites
3) Professional: $249 per year
With this plan you will get
- All Plus plan features
- Plugin updates
- Email support
- Unlimited sites
4) Ultimate: $499 one-time payment
- All Plus License features
- Lifetime plugin updates
- Lifetime email support
- Unlimited sites
If you are not happy with the product or service for any reason, you can simply contact them within 30 days of your purchase and they’ll refund you 100% of your money without any questions.
What Do Customers Say About WP Simple Pay?


Quick Links:
Conclusion: WP Simple Pay Review Detailed 2024 | Should You Go For It or Not??
WP Simple Pay is very helpful for online businesses because with the help of this software they can get paid directly. This is one of the best third-party payment options software with awesome reliability. You can easily collect payment through this software and you don’t even need to hire a developer because this software is really easy to use and it doesn’t require any type of coding skills.
The best part is that this software is also available on mobile devices and it is optimized to give the best experience even on smaller screens. The payment is secured. It took some awesome security measures to secure those payments. The developers are focused on giving the best experience along with that total security. Even your website visitors can put the amount in the Amount box. It also supports more than 14 languages which are really good for business if they are thinking to expand their business all over the world.
If you like this review on WP Simple Pay then don’t forget to share your opinions in the comment section and share this review with your colleagues and friends.