As a writer, it’s not only enough to write compelling, engaging, and intriguing blog posts to drive traffic.
So what else do you need?
Yes, you need to add relevant images to your blog posts too.
A few writers assume that their words should be enough to entice the audience, engage the visitors, and persuade people that the content is excellent.
But the truth is the opposite, especially when your post is for the web audience.
In this post, I’m going to show how you can create an Image Gallery in WordPress in just a few minutes.
Before getting to the step-by-step process let’s understand the need for creating an image gallery.
Why Create an Image Gallery
Images are a supporting tool that can take your content from bland to exciting.
If you add multiple images to WordPress, they appear one after another, which doesn’t look great.
Moreover, your viewers would need to scroll to view these images, which wouldn’t be very convenient.
Your audience wants to get the information asap without any struggle. And in the meanwhile, they want to grasp quickly whether the content is going to be of any value to them or not.
An Image Gallery makes your visual content look more appealing and easy to engage with.
Now let’s dive in and look at how you can create an image gallery in WordPress. You can do it with or without using a Plugin and I’m going to show you both methods, step by step.
How to create an Image gallery in WordPress: (Without Using A Plugin)
Suppose you want to create an Image Gallery in a New Post. Check out easy-to-follow steps below:
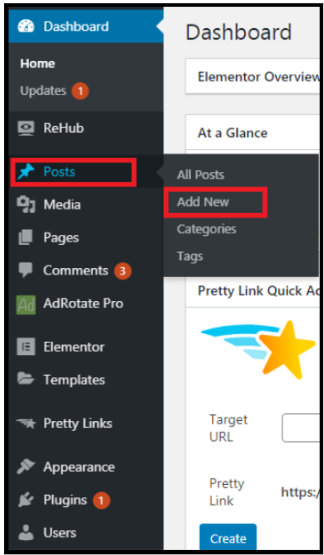
Step 1: Visit your WordPress dashboard, Go to Posts -> Add New
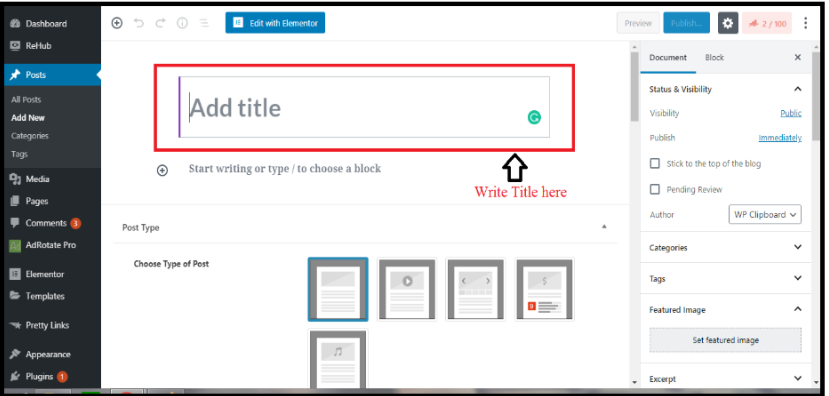
Step 2: Add the title of your post
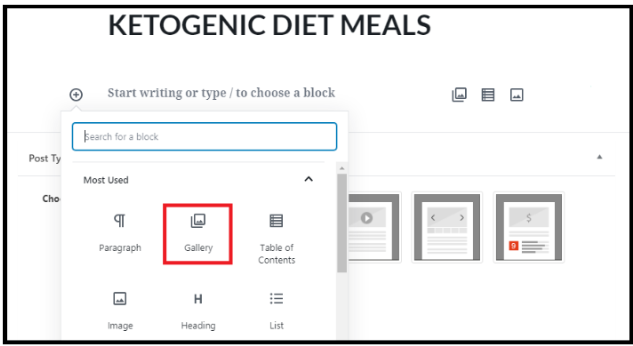
Step 3: Click on the Add Block.
Step 4: A box will open having numerous options. Click on the Gallery option.
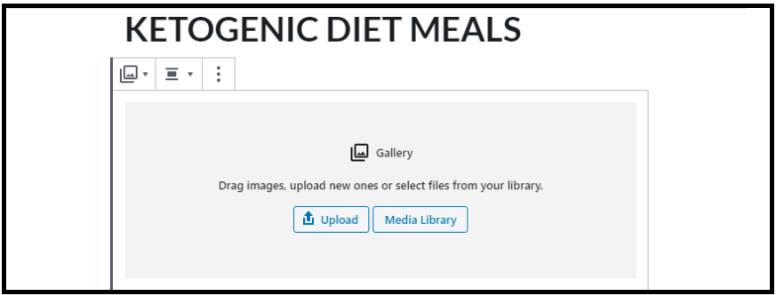
Step 5: Choose and upload the desired photos
Step 6: Click on the Gallery option at the top left corner.
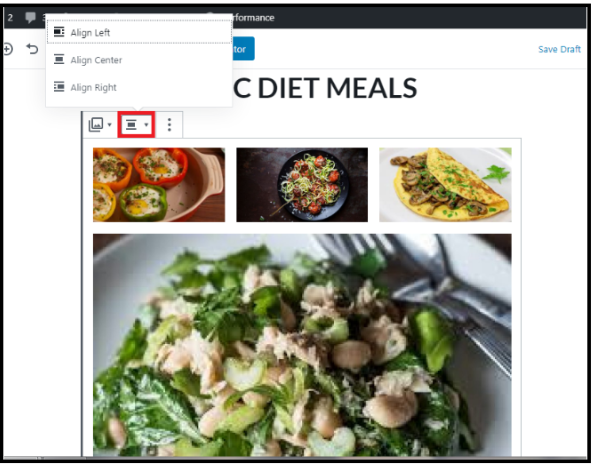
Step 7: There would be customization options like; Change block type or style, transform to group or image, change alignment, and much more.
Step 8: You can also write captions to define each image individually.
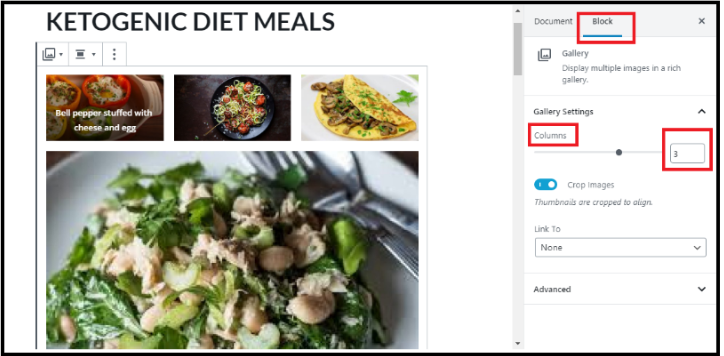
Step 9: You can also find some extra options on the right hand of the screen, i.e. to change the number of columns/ rows.
Quite convenient, isn’t it?
Now let’s see how you can create one using a WordPress Plugin.
How to create an Image gallery in WordPress: (Using A Plugin)
WordPress photo gallery plugins make it quite easy to display your images attractively.
But with so many options to choose from, it can be hard to dig through everything and find the plugin that offers just the right combination of features, aesthetics, and ease of use.
Some of the sought-after plugins you can use are; Modula, NEXTGEN Gallery, Envira Gallery, etc.
Here, I will be using the fantastic Modula Image Gallery plugin, so let’s get right into it.
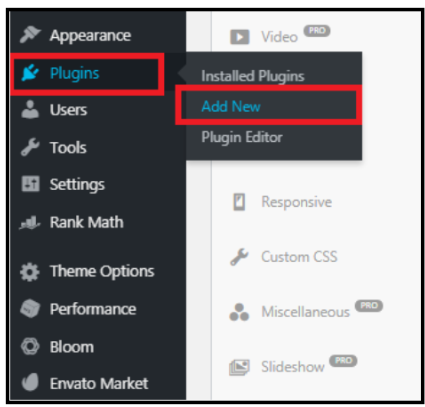
Step 1: In your WordPress dashboard, Go to -> Plugins -> Add New
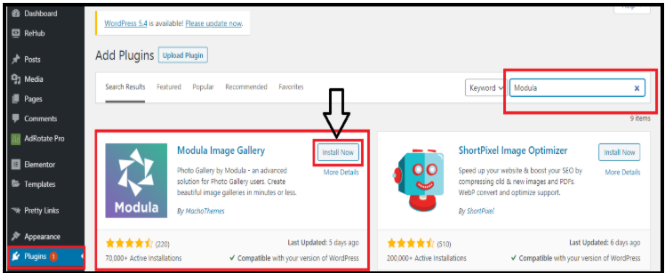
Step 2: Write “Modula Image Gallery” in the search bar at the top-right corner. Search results will appear. Click on Install Now
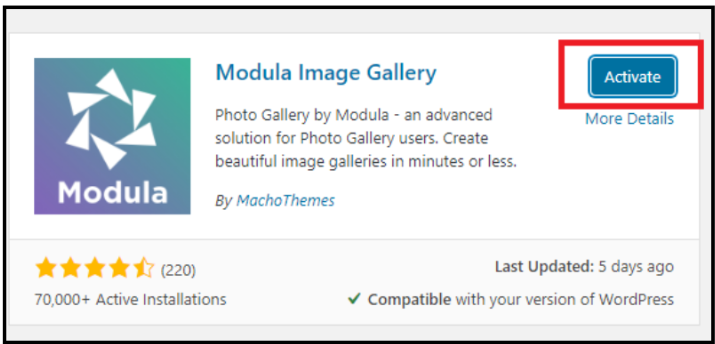
Step 3: Click on Activate
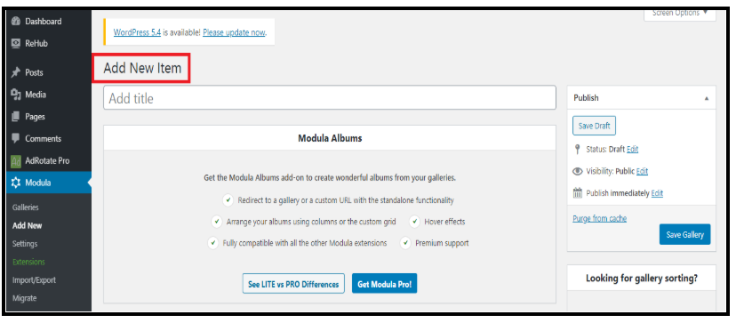
Step 4: A new screen will appear, having multiple options, i.e. Add new item, Gallery, and Gallery setting option. Click on Add New Item
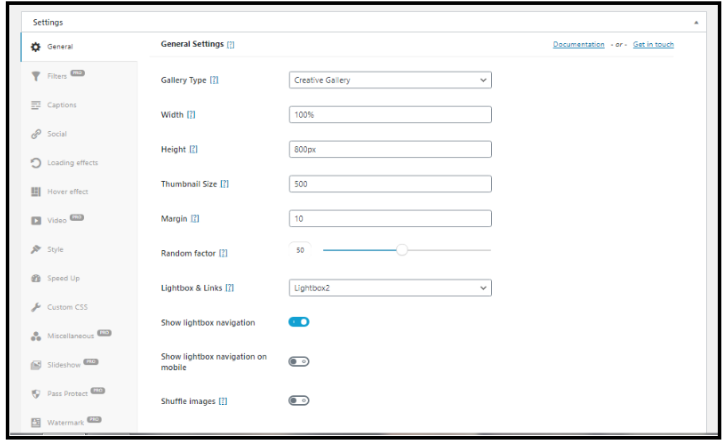
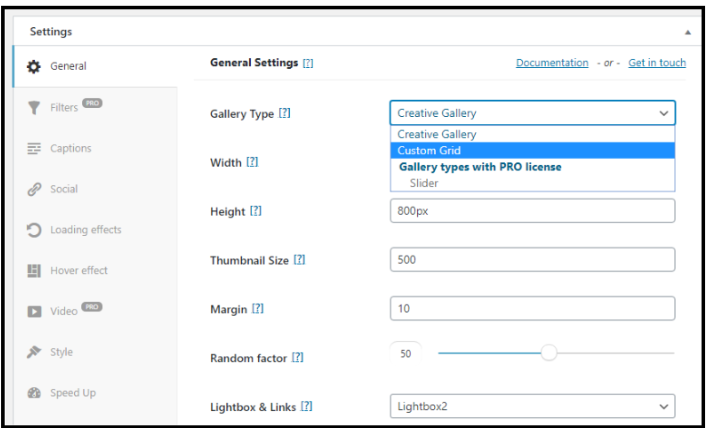
Step 5: Open Gallery settings. It will display various options for your image gallery.
Step 6: From the Gallery type drop-down, select the Custom Grid option
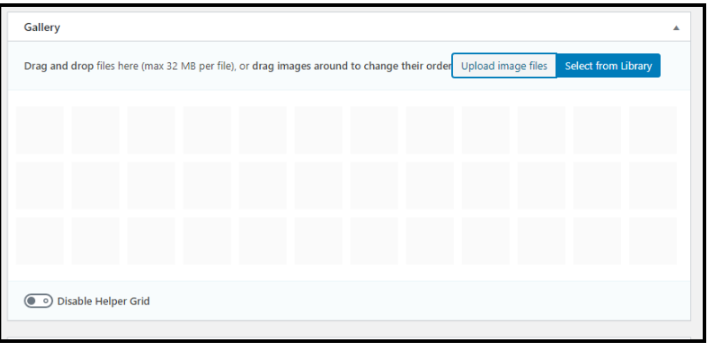
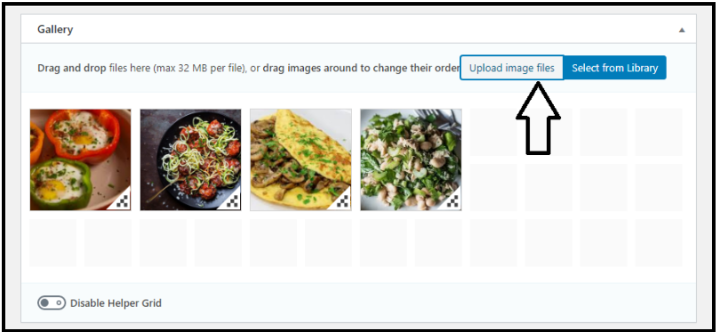
Step 7: Click on Upload Image files.
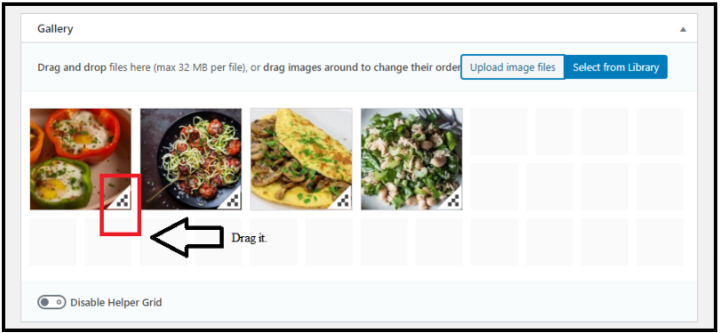
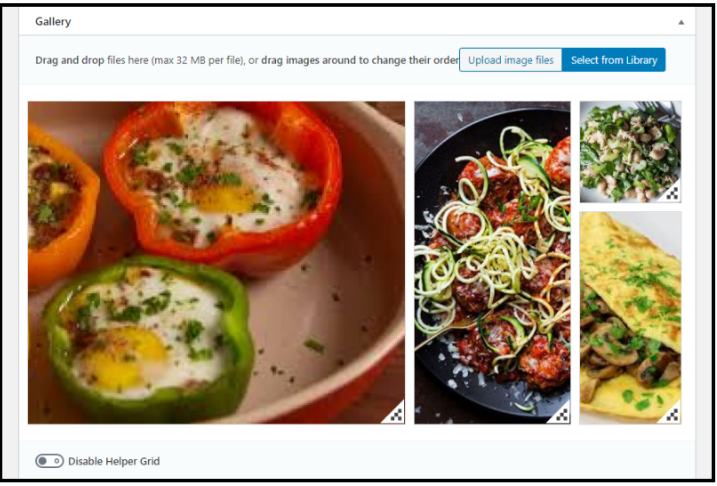
Step 8: Drag down the 3-dot design at the bottom-right corner of every image as you desire.
Step 9: Hover the mouse pointer at any picture you desire, 2 options will appear at the top-left corner. Click on the Edit Icon
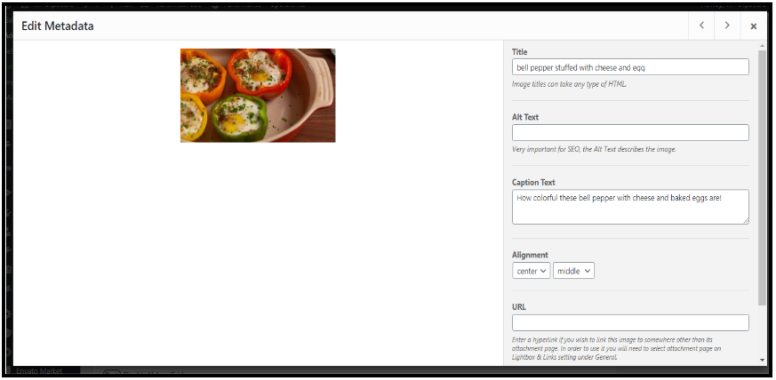
Step 10: A new dialogue box will appear. Add title and caption accordingly
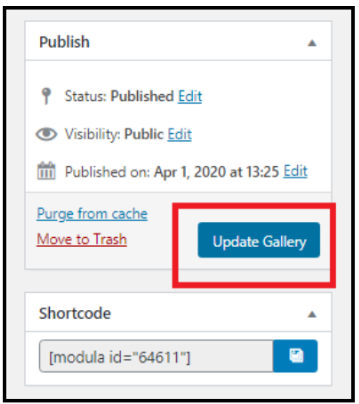
Step 11: Close the dialogue box. Click on the ‘Update Gallery’. And you’re done.
Now that you know how to create an image gallery in WordPress, here are some tips that can be helpful while creating one.
When to Use Image Gallery in WordPress
-
Portfolio
A portfolio shows your work and what you can do. There won’t be much interaction or engaging content. You want your images displayed at their best.
-
A Collection of Images
Maybe you attended an event and have a gallery of photos related to it. It’s not a portfolio, but just a collection of images in one place.
-
An Online Store
A store is a gallery of your work that people can also buy. You will need a gallery that can include a payment/inventory system as well as control featured items.
-
A Discussion
Some galleries are just meant to be a part of a community. It only focuses on sharing and commenting.
It’s a good idea to identify the purpose behind your image gallery before you start working on it.
Pro Tip: Optimize Your Images
Whether you have a blog, an online store, or a regular website that you want to look amazing, it pays you back to optimize your images
How does optimization help you?
- It helps to make your images look relevant and visually appealing
- Images load quickly to ensure optimum WordPress performance
- Ensure images are easy for search engines to index
Recommendations for Your Image Gallery
Here are some pointers that you should keep in mind for your image galleries.
- Don’t overboard your image gallery with a lot of visuals
- Choose a gallery view and setting which is easy to view
- Size your images as per display requirements
- Use JPEG or PNG format.
- Avoid uploading heavily altered photos
- Make sure your photos align with your company’s personal branding and personality.
- Review photos for mobile compatibility.
Quick Links:
- [Latest] Top 16 Best WordPress Page Builder Plugins
- SEOPressor Review: All-In-One WordPress SEO Plugin
- How To Reset A WordPress Blog Using Free WordPress Plugin
- How To Check Website Backups To Avoid Future Disasters
Conclusion: How to Create an Image Gallery in WordPress (2024)
To sum it up, if you want to display multiple images on your WordPress website, creating an image gallery is a smart move.
Did you manage to find these steps helpful?
Do let us know your thoughts in the comments section













Hi Amos,
Thanks for the tips man! Just one thing – you didn’t mention about how to make images available for an expanded view, from a thumbnail gallery. That’s what I’m looking for right now – maybe others would be too!
Cheers!
Charlie 🙂