Hey, If you’ve ever thought about starting your own blog but were overwhelmed by the process, you’re in the right place.
In the next 15 minutes, I’ll guide you through the straightforward steps to create your own WordPress blog.
No need for technical expertise or hours of setup – just a quarter of an hour, and you’ll have a platform to express yourself, share your interests, or even kickstart your online business.
Let’s start with this quick and easy journey to bring your ideas to life with your very own WordPress blog!
What Will you Need to Start a WordPress blog?
To start a WordPress blog, you’ll need:
- Domain Name: Choose a unique web address.
- Web Hosting: Select a reliable hosting provider.
- WordPress Software: Download and install WordPress.
- Basic Computer Skills: Navigate websites and use a web browser.
- Internet Connection: Ensure a stable connection.
- Email Address: Have an active email for registration.
- Budget: Allocate funds for domain and hosting.
- Ideas and Passion: Bring your content ideas and passion.
- Time and Commitment: Dedicate time to blog management.
- Optional (but recommended): Premium theme and plugins for enhanced design and functionality.
3 Steps: How To Start a WordPress Blog in 15 Mins 2024
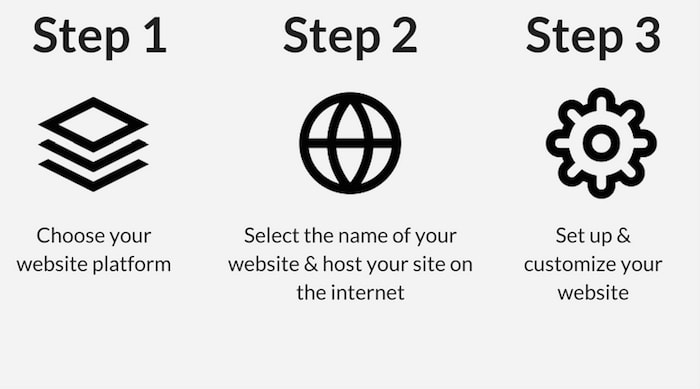
Just like any other normal website, there are various steps and requirements to create a blog. In this guide, I have compressed that list of requirements into 3 major steps with all other general steps revolving around it.
So, let’s jump right into it without any further ado.
A blog is just another type of website that requires a basic setup platform, domain name, hosting, and customizations. Once you’ve set up these things, it’s your choice to make it a blog or an online store.
Step 1: Choose Your Website Platform
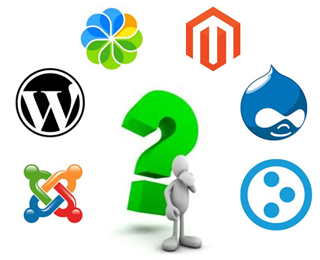
The first thing you need to worry about is deciding which platform you’re going to build your website with. You should preferably choose a user-friendly platform for building your website and managing your own online content.
A Content Management System (CMS) or website-building platform has made website building accessible to literally anyone and allows you to create your website and handle it instead of using a bunch of loose HTML pages.
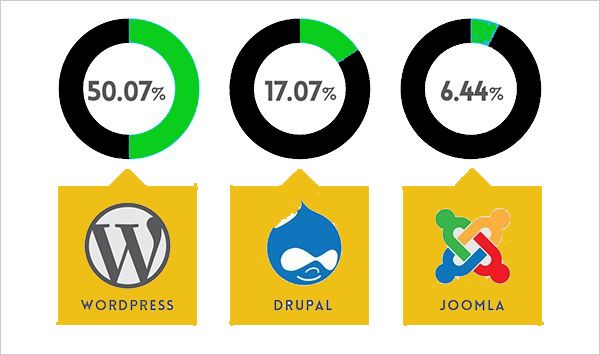
There are numerous website building platforms in today’s date, each having varying difficulties, functions, and features. Here is a percentage breakdown of the most popularly used website-building platforms today.
HubSpot CMS is one of the most user-friendly content management systems in the market. It allows you to create all sorts of pages and automatically optimizes your content for mobile and search engines.
Additionally, you can personalize your content for each website visitor based on location, source, device, language, or any other detail stored in your HubSpot CRM, from demographic information to your contacts’ interactions with your brand.
WordPress is clearly the most preferred and used website-building platform and leads the chart by a huge margin.
Let me list down the key factors that give WordPress such a comprehensive lead over other rival platforms like Drupal and Joomla. There are a bunch of advantages to be pointed out.
- It’s totally free.
Anything that’s free garners massive attraction. WordPress is no exception. You will not have to worry about creating a paid account for it. You won’t have to pay any downloading or installation costs.
- Highly customizable and easy to use.
WordPress is the easiest platform I’ve worked with. It has an easy user interface, is highly flexible, and will suit everyone’s purpose.
When it comes to customization, WordPress offers a huge community that has designed attractive themes, layouts, and templates that you can choose from to beautify your website.
- Beginner friendly.
It’s more important to be “Beginner friendly” than being “User friendly”. WordPress has an entire collection of useful and free plugins that enable you to handle any type of site you wish to create.
“Plugins” enable you to add contact forms, subscription forms, image galleries, etc., and offer a more interactive setup to your website.
- Great for both small and large websites.
WordPress can easily handle light-sized blogs to large-scale business websites and online stores. In fact, WordPress is used by large-scale sites like eBay, Mozilla, CNN, and even NASA.
- Responsiveness and compatibility.
Once you build a website, you would want it to function on almost every mobile device possible. Websites built through WordPress are responsive and work on smartphones, tablets, and laptops.
- No coding is required.
You don’t need any technical coding to create a website on WordPress. Perhaps this is the prime reason why WordPress is the most preferred website-building platform today.
- Best SEO
WordPress provides you the best search engine optimization (SEO), which makes your website more likely to attract more customers.
Step 2: Choose a Domain Name and Hosting
Step 2 puts in front two important requirements for the proper existence and functioning of your website:
- A domain name (Something like yourblogname.com)
- A host (To connect your site to the internet)
A domain name is simply the web address that you will type into the search or URL bar to navigate to your site. It will be your personal blog address where people find you over and over again. It defines the very existence and identity of your website.
A domain name can be chosen by either purchasing your own custom domain name through your preferred website builder, or you can purchase it on your own through online domain registrars GoDaddy or NameCheap.
A host is a medium that connects your website to the internet server. Having a hosting server will make your website load quickly and allow people to access it easily. Without web hosting, you’ll be unable to use your domain.
I would strictly suggest NOT TO create a “FREE” website/blog as it has a list of disadvantages that will put you down.
- Free websites are owned by the provider, NOT YOU.
- Such websites can be taken down at any time without prior notice.
- The provider will put their own ads on your site.
- You can’t make money from a free website.
Where can I get my domain name and hosting?
If you search on the internet, you will find there are countless authorized and reliable sites where you can get your domain name and hosting.
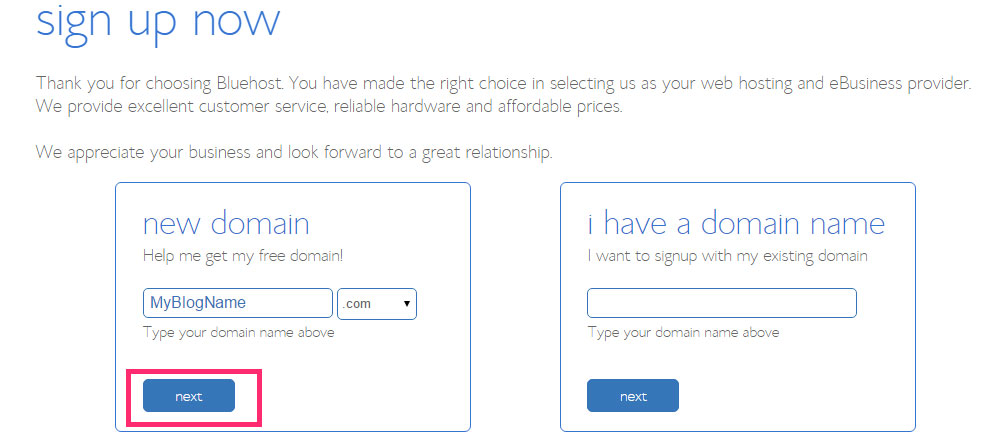
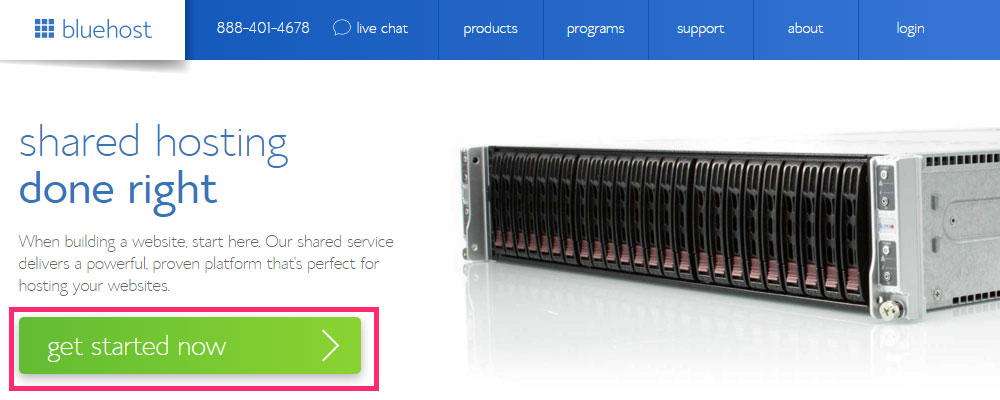
But if you ask me to pick one out of the lot, my personal preference would be www.Bluehost.com
How do I Choose a Domain Name?
As I mentioned earlier, a domain name defines the identity of your website. You should always think of a domain name that is SIMPLE AND DIRECT.
People should be able to find your site easily and remember the name so they can share it with others.
Your domain name must –
- Be relevant to your business/service.
- Justify and reflect the idea and purpose of your website.
- It is easy to remember.
- Be simple and direct.
If you are creating a website for non-commercial activities like broadcasting views and content through blogging, then the domain name of your website should be something like Yourname.com or Yourblogname.com.
NOTE:
Always remember to secure your domain name and web hosting before you continue with your website setup. This process is called Domain Privacy Protection (DPP). It hides your registration information in the “whois” database. It is a worldwide database that everyone has access to.
I would strongly recommend this if you want to keep yourself secure and anonymous. Bluehost.com allows you to do this without any hassle.
Step 3: Setting up WordPress and Customization
Steps 1 and 2 describe the basic foundation of your website/blog. Now, let’s get it up and running. The next important thing you need to do is set up WordPress by installing it on your domain.
This can be achieved in two ways. One is very easy and direct, while the other one is very hard and complicated.
- One-Click installation
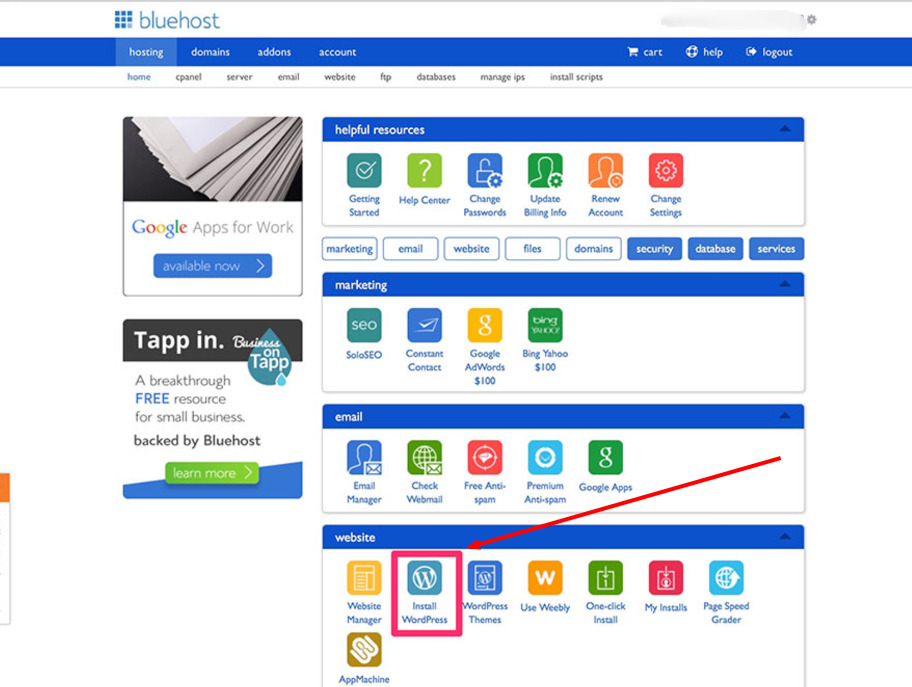
It must be clear from the name itself that this process is a direct and quicker way to install WordPress into your domain. Most hosting websites offer integrated “One-click installation” options to make the installation process faster.
- You will need to visit Bluehost.com (Or your chosen hosting site) and log in to your account to get started.
- Head to the cpanel (Control panel)
- You will find the “WordPress” icon.
- Choose the domain where you want to install your website.
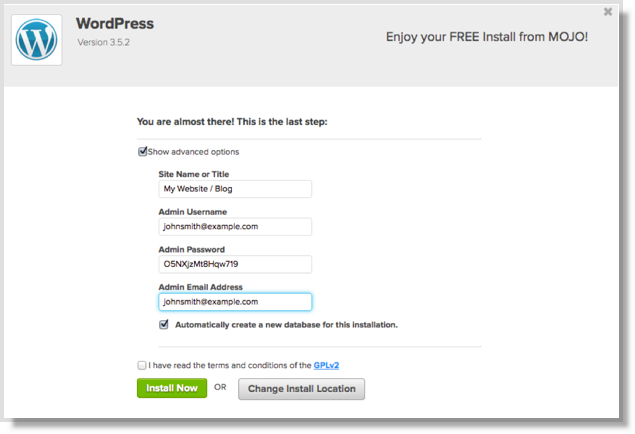
- Click on the “Install now” button.
- You will now get access to your WordPress website.
- Manual installation
In some really rare and mysterious cases, a hosting site does not provide the “One-click installation” option. In such a situation, manual installation shall be used.
Manual installation is also possible if you are unable to go for the “One-click.” Though this process is needlessly complicated, it must be followed when required. Here is a quick guide on how to go ahead with it.
- Download WordPress from here: http://wordpress.org/download.
- Create a new folder on your desktop and unzip WordPress in it.
- Look for a file named wp-config-sample.php
- Rename it to: wp-config.php
- Open the wp-config.php and fill in the following lines:
- define(‘DB_NAME’, ‘database_name_here’);
- define(‘DB_USER’, ‘username_here’); – Enter your hosting username
- define(‘DB_PASSWORD’, ‘password_here’); – Enter your hosting password
- Now save the file after making the above changes.
Now, let’s get you in with the login process.
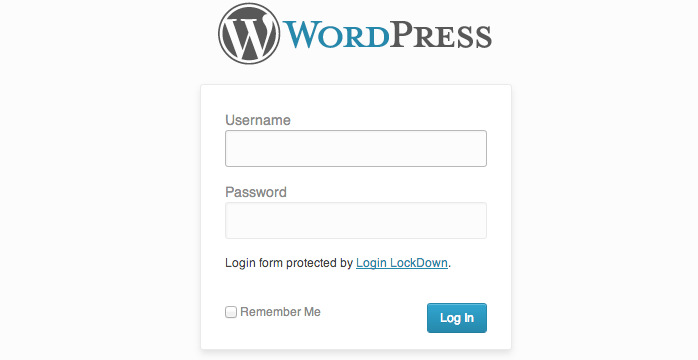
- Go to com/wp-admin
- Enter the username and password that you used to create your WordPress account.
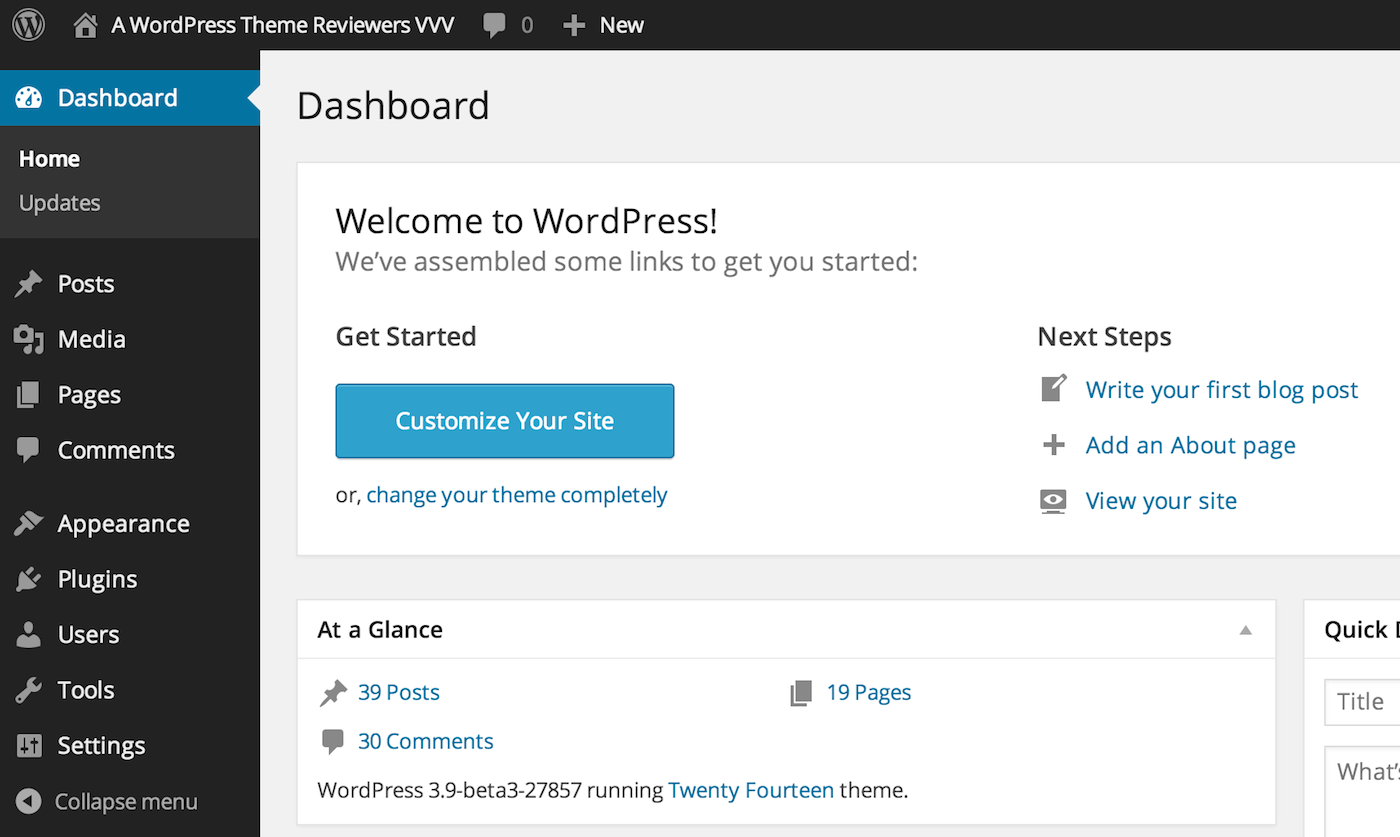
- The first page that will load up for you will show your WordPress admin menu.
General settings and customizations
You will find a list of various options in the menu sidebar to click and explore, but for now, let me take you through the initial customizations and settings.
Let us start with applying a theme to your blog.
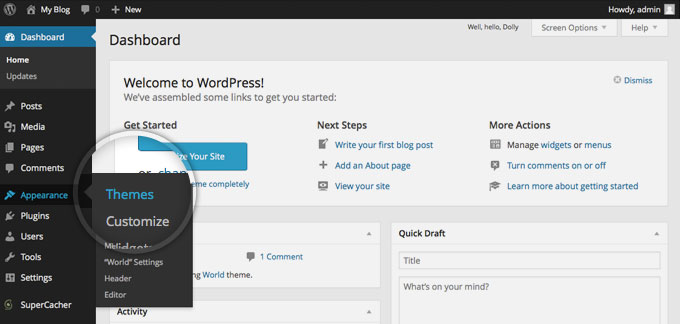
- Scroll down the dashboard to find the “Appearance” option.
- Click on “Themes.”
- Now click on the “Add New” button on the top and choose from the various themes displayed. You can even search for themes according to your preference.
- After you have chosen your preferred theme, install it and activate it.
Top 10 Highest-Earning Blogs 2024
Here is an updated list of the top 10 highest-earning blogs in the world.
- The Huffington Post (Monthly earnings: ~$2,330,0000)
- Mashable (Monthly earnings: ~$560,000)
- Perez Hilton (Monthly earnings: ~$450,000)
- TechCrunch (Monthly earnings: ~$400,000)
- Smashing Magazine (Monthly earnings: ~$190,000)
- Timothy Sykes (Monthly earnings: ~$150,000)
- Gothamist (Monthly earnings: ~$110,000)
- Tuts Plus (Monthly earnings: ~$110,000)
- Car advice (Monthly earnings: ~$70,000)
- Venture beat (Monthly earnings: ~$60,000)
Why You Will Find This BLOG Setup Guide Useful?
If you are reading this guide, then here’s why you will find this BLOG setup guide useful.
- This blog setup guide is simple and PERFECT FOR BEGINNERS.
- Direct and easy to understand. This guide is not complicated, and I guarantee you will have a well-functioning blog by the end of this guide.
- This guide is up to date with the latest facts and trends and is updated on a regular basis.
- This guide primarily focuses on the WordPress platform to get you the best results.
- Help on demand. Contact me via email or drop your comments down below. I will be glad to help you with your queries.
- IT IS FREE!
How do I Create Pages for My Blog?
WordPress allows you to add pages to your blog according to your preference. You should add pages to your blog that are relevant and make sense. Pages like a “Services” page, “About me/us” page, “Contact me/us” page, “Contents” page, etc., all can be added to your blog.
Free Premium Theme – Themify Ultra
If you’re looking for a WordPress theme, chances are it’s rare to find something that is both beautiful AND free. We’ve partnered with Themify to offer you a free version of their most popular theme, Themify Ultra.
The free version we are currently offering is a stable version of the official and most recent version of the Ultra theme.
The Ultra is loaded with a number of instant demo import sites that actually function and work for their intended use. Use their shop to market your affiliate product links and make the most of your E-Commerce WordPress site.
Perhaps you need to set up a quick portfolio site – this is easy using their instant demo import. Create a site with identical features and layout, and use Themify’s industry-recognized Builder to tweak as much or as little as you want!
It is intended for personal and educational uses only. It has all the features of the premium version except the 12 bonus Builder Add-ons, which are not included.
If you like it and would like to take your relationship with Themify to the next level, we have a 20% off coupon code for you. Please use this coupon code for your 20% off today: BLOGGERSIDEAS
Ultra Theme Features
The Ultra Theme will give users access to the following:
- 19+ Skins/Demos (Including the New Ultra Coffee Skin, Lifestyle Blogger Skin, Horizontal Skin for photo bloggers, and so much more!)
- 12 Free Bonus Builder Add-ons (Not available in this free, educational version of Ultra)
- Use On An Unlimited Number of Sites
- Access to One Year of Downloads, Updates, and Support
- 30-Day Money Back Guarantee!
How to Install Themify Ultra?
- Download the themify-ultra.zip and save it on your computer (you don’t need to extract the zip file)
- Go to Dashboard > Themes, click “Add new,” then click on the themify-ultra “Upload Theme” button.
- Upload the themify ultra.zip and activate it.
Themify Ultra documentation: for more information on how to use the Ultra theme, refer to their Ultra theme documentation.
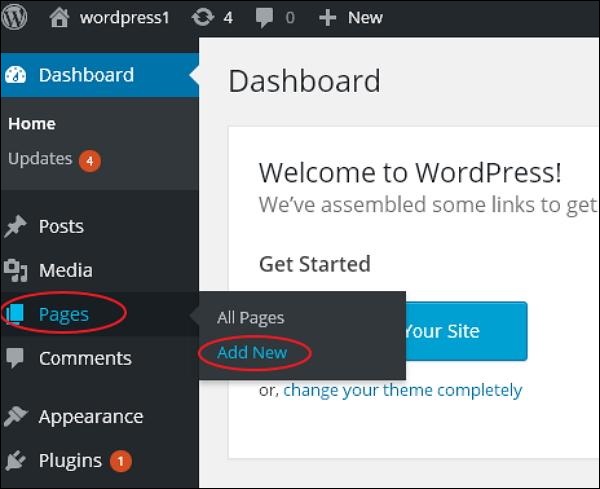
- Just go to the “Pages” option in the dashboard side menu.
- Bring your cursor over it and click on “Add new.”
- When you do so, it will open up a blank screen that looks similar to what you have seen and used in Microsoft Word.
- You can add text, images, and more to build the page the way you want and then save it when you’re done.
Create your homepage
A homepage is the face of a website or blog. It makes your website look more organized and acts as a neat entrance to your blogs and posts.
If your website doesn’t have a homepage, then your posts will show up there each time you create one. This looks kind of untidy and unprofessional.
Creating a homepage for your website involves 3 very simple steps. Here’s how you can do it.
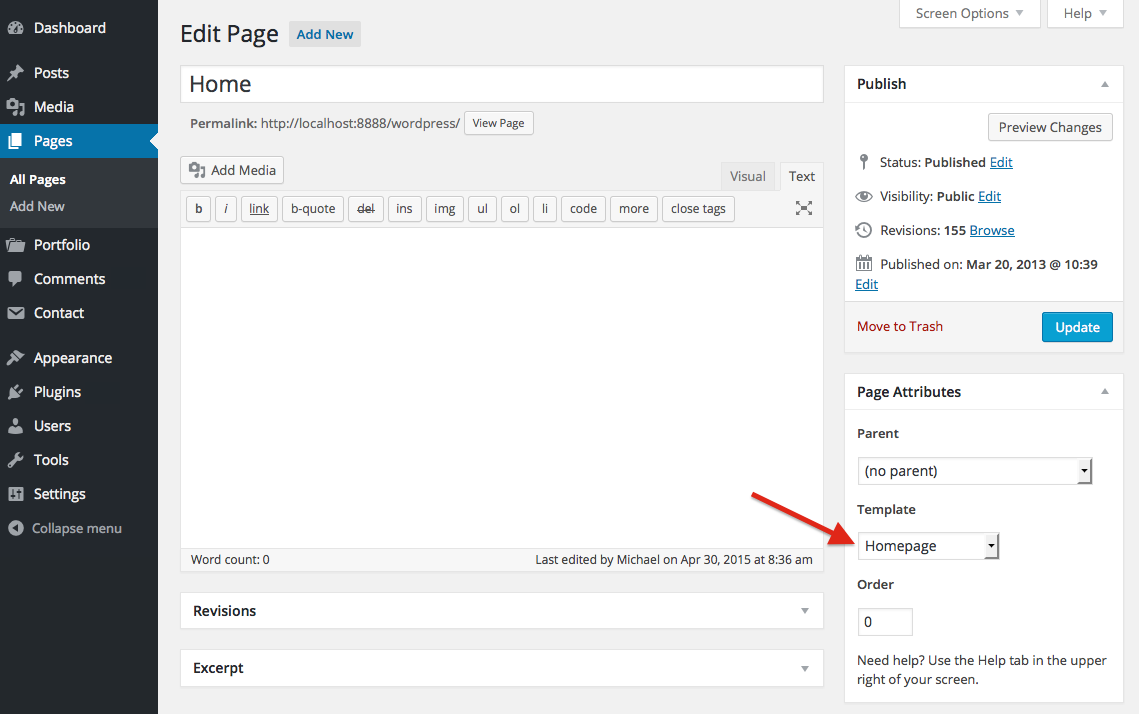
- Go to“Settings” and then “Reading”.
- You will find two options for creating pages. The front page is your home page, and the Posts page is the page for your blog.
- Choose the page you want to add.
How Should I Add Posts To My Blog?
Once you have learned how to add a page to your blog, let’s learn how to add some posts and edit them. There is nothing too tricky about this.
The first thing you need to do is decide the appropriate category of the post you are going to write. Your blog posts can be organized into different categories based on the topic you are writing on.
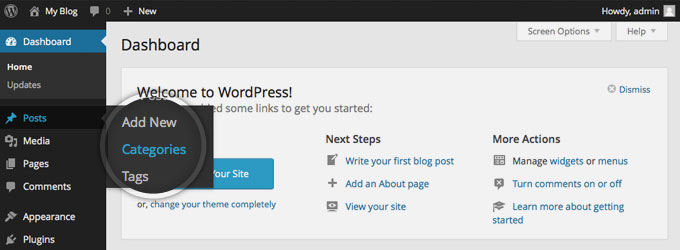
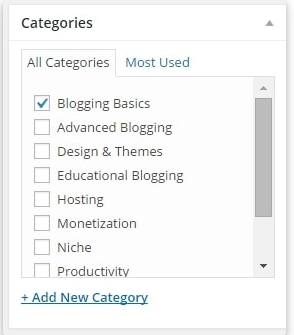
- To add categories for your posts, just go to “Posts” and then “Categories.” You can add as many categories as you want to this list according to the content you come up with as your blog matures.
- You can also choose to add your categories after you are done writing your entire post.
- Check the proper box in the categories section when you are finished writing your post.
- Every post you write keeps getting saved automatically after every change you make. However, I would still recommend that you manually save your draft changes after every update.
Adding media to your posts
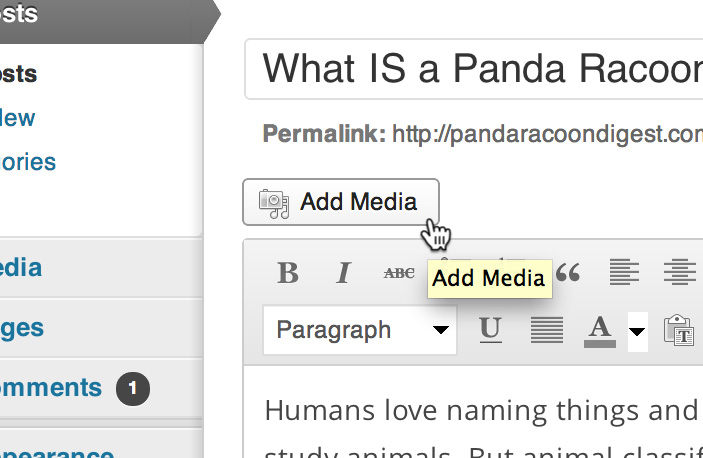
Posts with images and media are catchy and can easily attract audiences. Good content should always have relevant media and images along with it to keep readers engrossed and let them relate to your posts easily. Images also make your posts more understandable.
If you’re wondering what types of files you can upload to your WordPress posts, here’s a comprehensive list of all the supported file formats:
– Images: .jpg, .jpeg, .png, .gif, .ico
– Documents: .pdf (Portable Document Format; Adobe Acrobat), .doc, .docx (Microsoft Word Document), .ppt, .pptx, .pps, .ppsx (Microsoft PowerPoint Presentation), .odt (OpenDocument Text Document), .xls, .xlsx (Microsoft Excel Document), .psd (Adobe Photoshop Document)
– Audio: .mp3, .m4a, .ogg, .wav
– Video: .mp4, .m4v (MPEG-4), .mov (QuickTime), .wmv (Windows Media Video), .avi, .mpg, .ogv (Ogg), .3gp, .3g2
NOTE:
Always remember to add an image title, a description, and a caption to the image. But it’s more important to add an “Alt text” to it. This helps search engines identify your images.
Adding links to a post
It is always necessary and recommended to insert useful and relevant links into your posts.
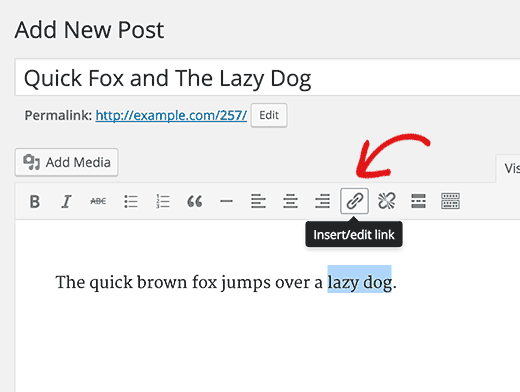
These are called “Chain links” and are often required to provide an extension to your research and knowledge by adding video links, news links, links to other well-recognized blogs, and many more.
It’s easy! Simply click on the “Chain link” icon in the toolbar to insert a link into your post.
DO NOT add unnecessary or extra links. The links you add should be relevant to your content and must help enhance the readability of your posts.
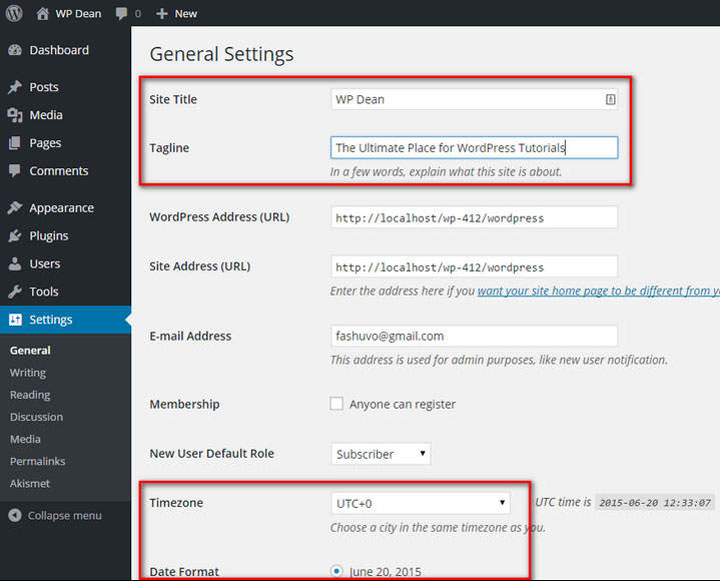
Page title/Site title setup
A page title will be what people see on search engines when your site or its pages show up in the search results. You should always remember to use the appropriate keywords for the page title of your website. Make sure to keep it SIMPLE AND DIRECT.
Taglines
A tagline is added to the page title to simply add a little more meaning to it.
You can manage both your page title and tagline by heading to “Settings”, then “General”.
Enabling/Disabling comments
Comments are an integral part of any website. It gives a more interactive feel to your website, be it a blog, niche website, or even an online store.
Allowing your readers to post comments often lets you know how good or bad your post is. Comments also help improve your future posts and website optimizations based on the views and opinions of viewers.
It is a useful way to stay in touch with your readers.
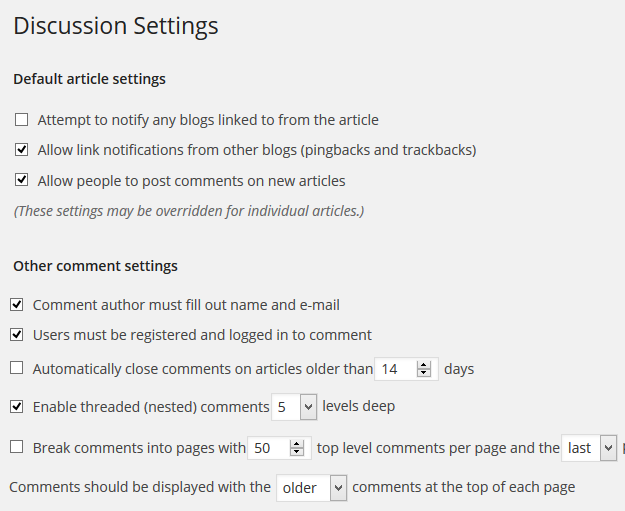
While many find having people commenting on their posts pretty useful, some may not want people commenting on pages or posts. Access to settings for comments can be easily found in the WordPress menu.
Just click “Settings” and then “Discussion”. Now check or uncheck the “Allow Comments” option according to your preference, whether you want to enable or disable comments in your posts.
How to Add Plugins In WordPress?
Plugins are very useful for almost everything, including adding photo galleries and submission forms.
What is a plugin? Why is it important?
Plugins are codes that will enable your website or blog to perform various functions. If you want to add more features and optimize the functionality of your website, then adding plugins is a must.
These are simply extensions that allow you to enhance the capabilities of your website. If you install plugins, you will be able to get your website to do what you want to.
How do I install and add plugins?
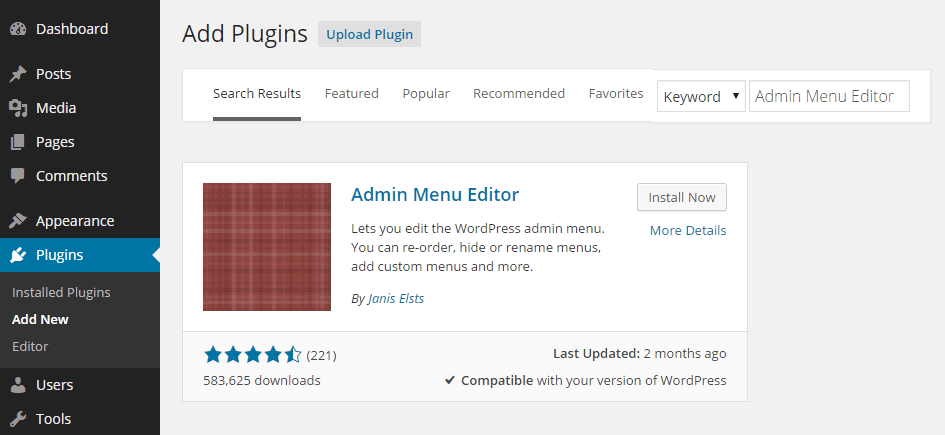
If you want to start adding new plugins to your website, you will need to first install plugins.
- Go to “Plugins,” then “Add new,” and start searching.
- You will find thousands of plugins to choose from. Once you have found the plugin you like, just click on “Install.”
Popular Plugins Used by Bloggers:
There will be hundreds of different plugins that can perform the same function.
To help you save some time in choosing and installing the ideal plugins, here is a list of the most popular plugins bloggers use today.
1) Yoast SEO (WordPress specific)
This plugin allows you to edit your title tags, meta descriptions, and a lot more before publishing the post. All this can be done from within the page itself.
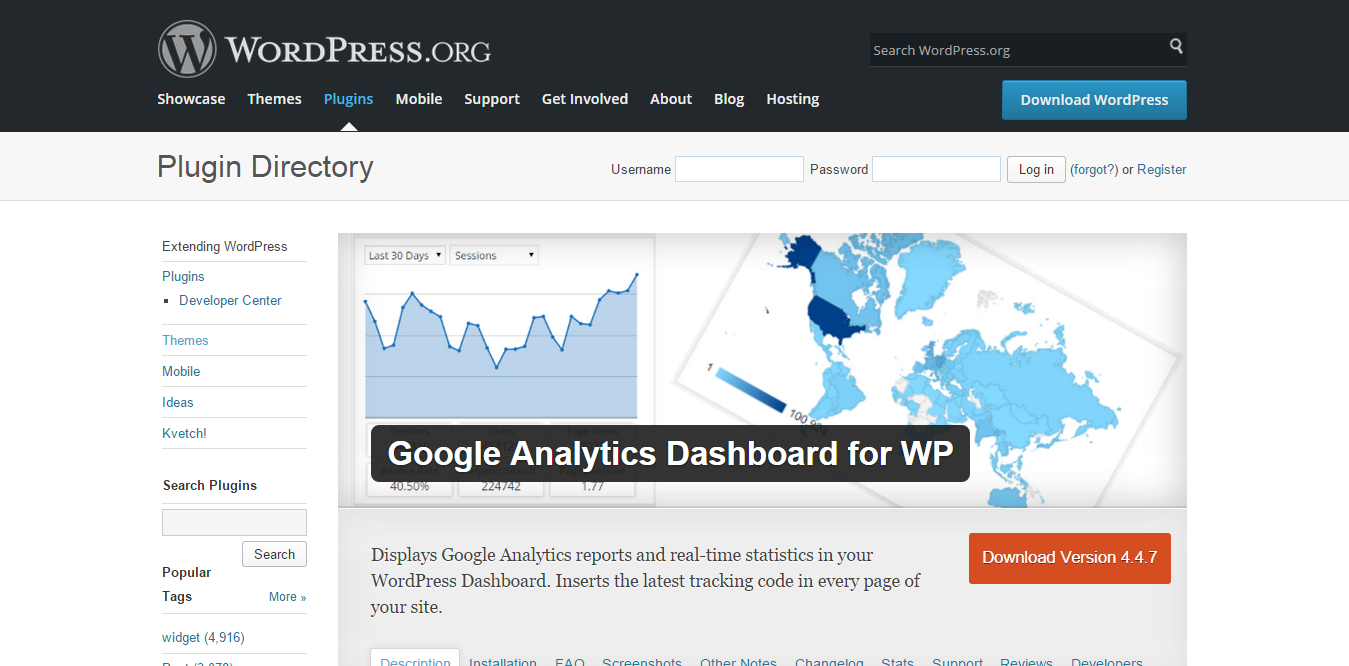
This is a very important tool if you are interested in tracking the visitors/traffic to your website or blog. All you need to do is install the plugin and link it to your Google account.
3) BackupBuddy
Helps you create an automatic backup for your website or blog. It offers you 1 GB of free cloud storage to store your backups.
4) W3 Total cache
It helps optimize the speed, performance, and functionality of your website and also provides advanced control options.
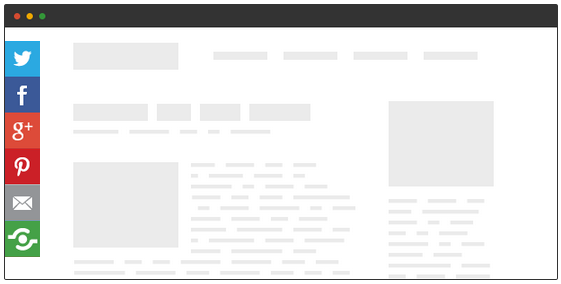
5) Floating social bar
This plugin will let you add share buttons for social media like Facebook, Twitter, Linkedin, etc. FCB will be very crucial for the publicity of your blog or posts to various social media platforms by your visitors.
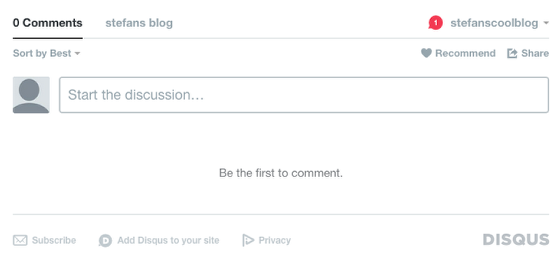
6) Disqus
If you are blogging, then you are bound to have a number of comments and opinions posted by your readers on your posts. Disqus helps manage your posts when a large amount of comments drop in. It also provides a voting system for displaying the top comments.
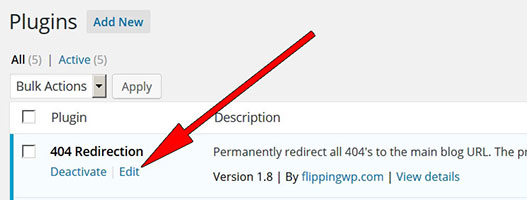
7) 404 Redirection
This plugin simply helps redirect broken pages back to your homepage.
These plugins will help expand your site’s features and give you new and enhanced capabilities for better and smoother growth of your website.
Also read:
- Top WordPress Plugins To Make Your Website Responsive
- Top WordPress Plugins for Your Business Blog
- Top Best WordPress Plugins List You Must Have
- Detailed Grasshopper Discount Coupon Code
- Detailed StableHost Review
Things to do After Your Blog is Ready ✨
Once you have set up your blog and learned the basics, let’s take a look into some important things to do for post setup. These points will be crucial if you want to make your blog a success.
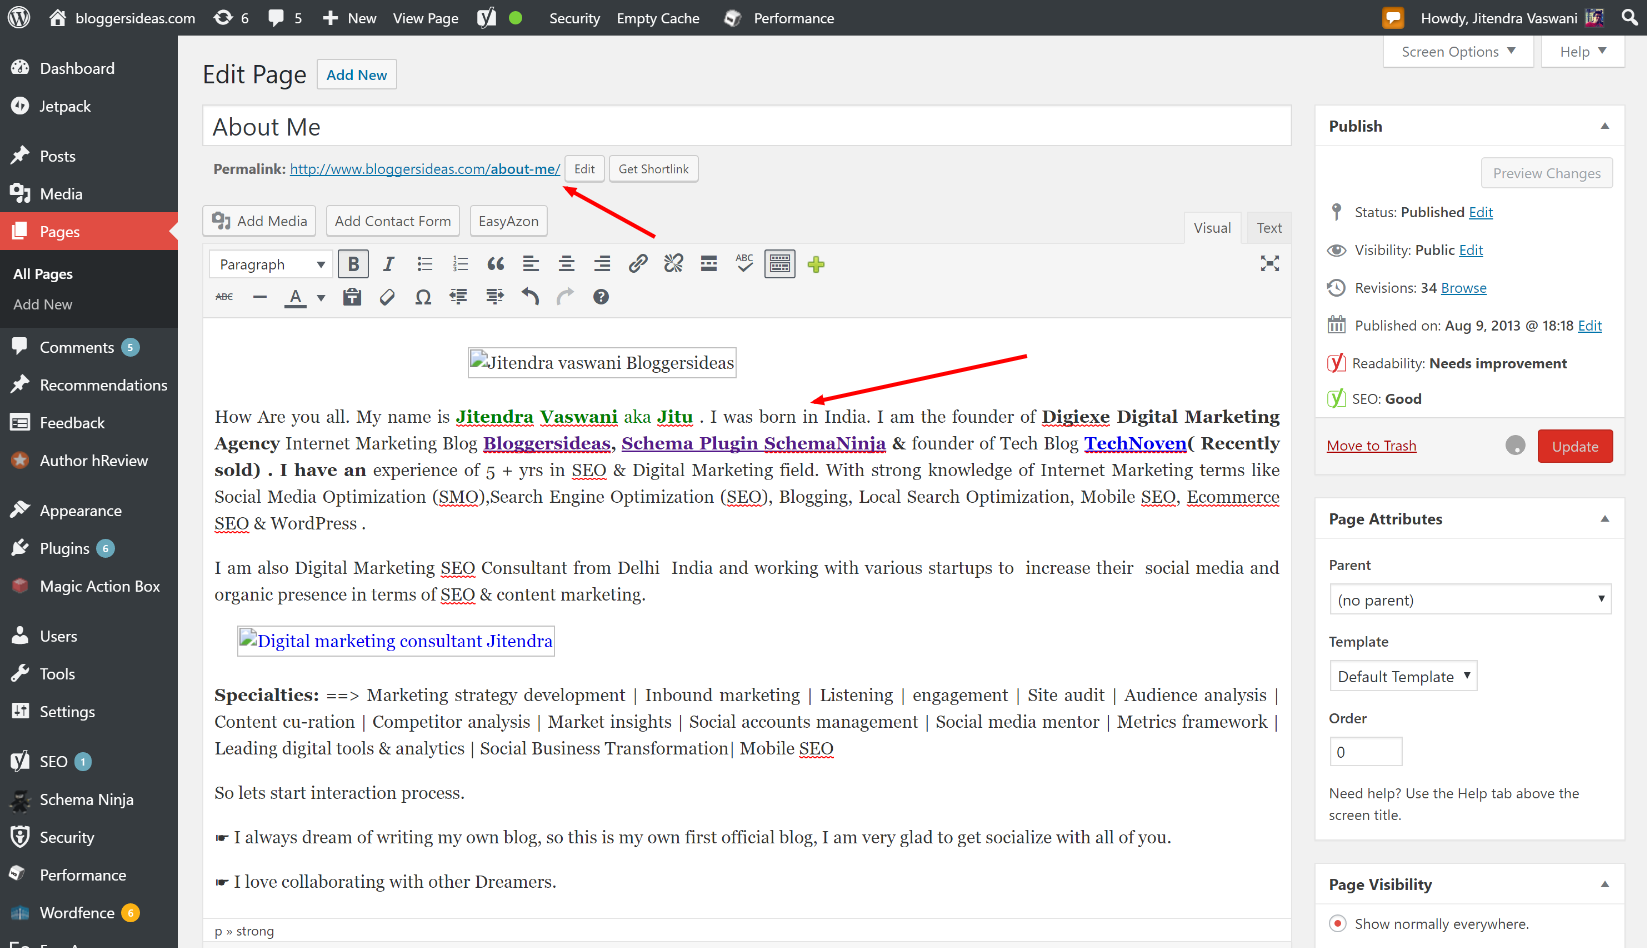
Create an “About me” Page.
This page simply tells your readers about the creator or author of the website or blog. It is usually the most visited page in a blog, so you better put some brains and effort into making this perfect.
- Your “About me” page should be attractive to grab the attention of your readers. Try opening the page with an interesting header instead of the typical and boring “About me/About us” headline.
- Highlight important and relevant points, terms, or sentences in the content to keep your readers interested and engrossed.
- Add relevant and interesting photos, videos, snapshots, etc., from behind the scenes to make it look more personable and presentable. People should be able to connect, relate, and be inspired by this content.
- Add some snapshots from social media platforms showing people sharing and commenting about you, your blog, and your work. This will add leverage to your credibility and buy the trust of your readers.
- Add a simple and short bio/description about you and your life, along with a nice photograph of yours.
- Focus on telling your readers WHY YOU DO IT.
- Don’t try to be over-creative with your language and grammar. Just write the way you talk.
- Keep the content DIRECT AND RELEVANT.
Create a “Contact Me” Page
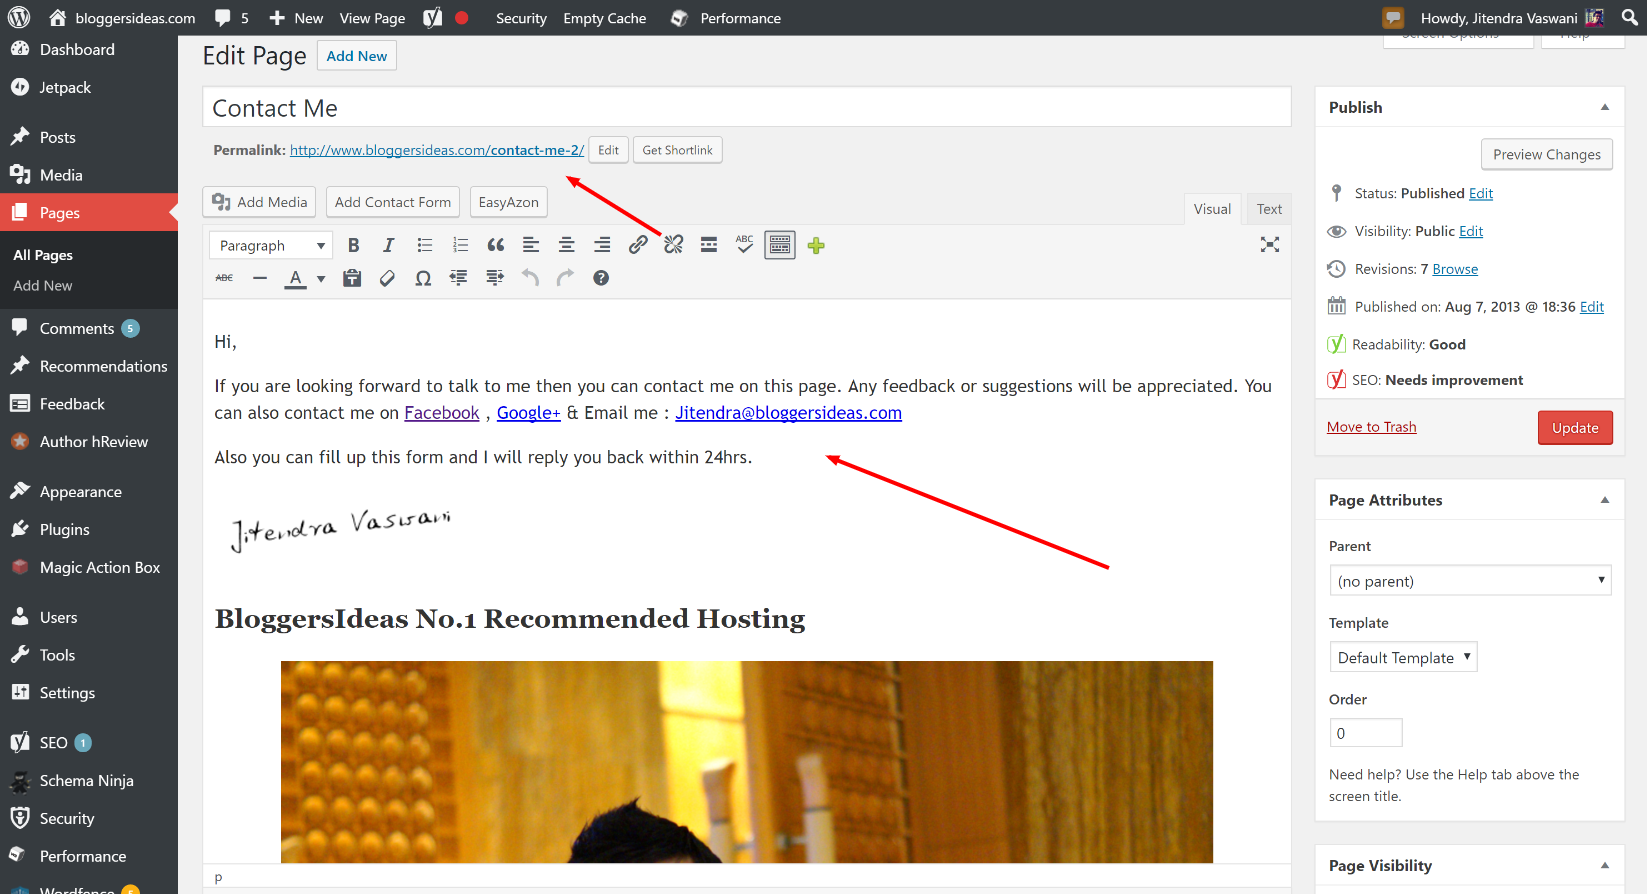
Once you are done with the ‘About Me” page, it’s time to set up your “Contact Me” page so that people can contact you.
For this, you will need to install a plugin called “Contact Form 7”. This plugin allows your visitors to contact you with their doubts, queries, or collaborative projects. They can fill in the form and send you an email without logging into their own email provider.
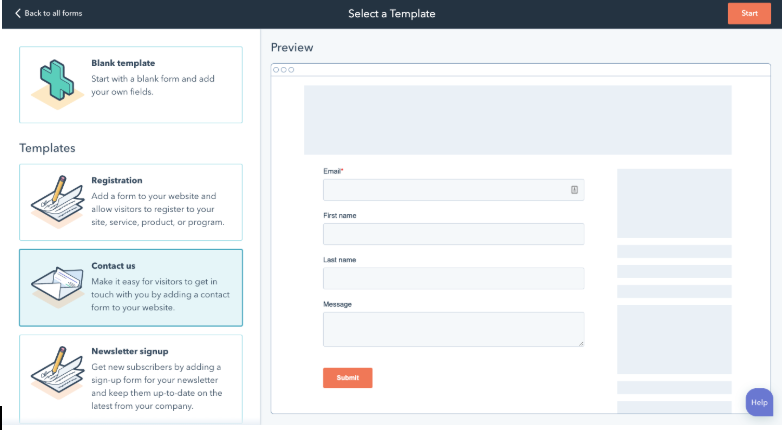
If you don’t want to use Contact Form 7, there are lots of other form plugins out there, including HubSpot All-in-One Marketing. It comes with pre-built templates, including a “contact us” form template that you can easily work off.
I have described how you can install and add new plugins in the “How do I add and install plugins?” section above.
- Once you have installed and activated the plugin, you will find a new “Contact” area in the WordPress side menu.
- Click on it and choose “Add New.”
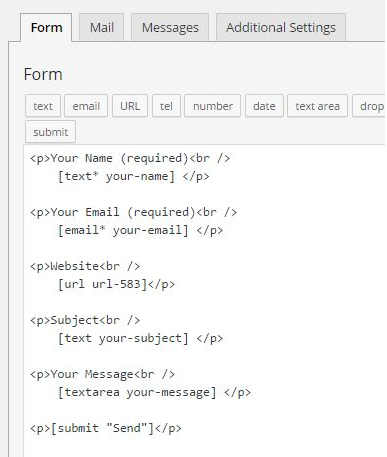
- It will open up a coded form in the “Text format.”
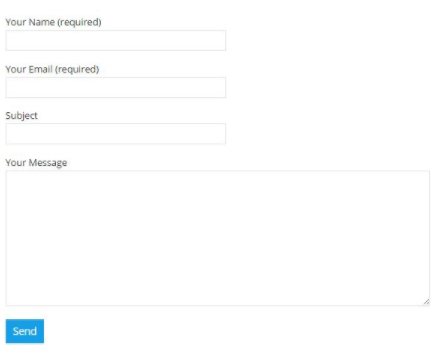
- Your default contact form will include these fields:
- Your Name (Required)
- Your Email (Required)
- Subject
- Your Message
- Fill out this form and click on “Send” to get it approved.
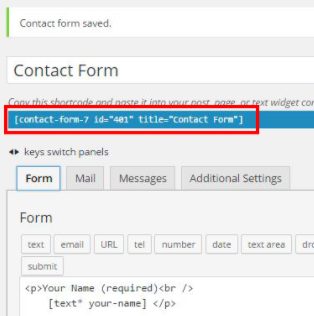
- Once this is done, you need to add this contact form to your blog.
- After you have saved your contact form, you’ll notice a short code show up directly below your contact form’s title. Copy this code.
- Now, navigate to the page you want to display your contact form.
- Place your form where you want it to show up. Just right-click and click on “Paste.”
- You can even choose to add your contact form as a widget. Just head to the widgets section in your WordPress side menu.
- Go to “Appearance”, then “Widgets”.
- Now, from the list of available widgets, choose “Text,” and then add the widget according to your preference.
- You can add your contact form as a widget in your sidebar or footer.
- Regular redesigning and optimizations
If you want to keep your blog up to date and running, then you, as a blogger, need to remain updated with the latest in trends and technology.
Audiences are always eager and curious to see something new and attractive. You should enhance your blog in such a way that it creates a positive visual impact on the viewers.
Blog optimization is not just limited to the beautification of your site; it also focuses heavily on speed, performance, and functionality.
If readers find your blog outdated, then it may lead to high bounce rates and a decline in traffic.
How Do You Earn Money From Your Blog in 2024?
Once your blog is ready, you must be very excited to know how your blog will fetch you some revenue. Generating money from a website is definitely some hard work.
You should never expect your blog to start earning as soon as it is set up. It may even take a month or two for your earnings to start and stabilize.
But if you work on your blog the right way, optimize it, and update it on a regular basis, then the earning process will definitely become easier in the long run. You can wisely choose to invest the money you earn from your blog into future modifications of your blog or into your other projects as well.
It is very much necessary that the monetization methods of your blog keep evolving with the latest technologies and trends. You need to stay up-to-date with the current web and social trends.
With the advent of technology and a revolution in the world of advertisements, monetization methods are also evolving along with it.
FAQs
👀 Can I make money with a free WordPress blog?
While you can start with a free WordPress.com blog, it's recommended to go for self-hosted WordPress.org for more monetization options and control.
🤔 What are the common ways to make money with a WordPress blog?
Common monetization methods include affiliate marketing, sponsored content, display ads, selling products or services, and offering online courses.
🤥 How can I drive traffic to my WordPress blog?
Use social media, SEO optimization, guest posting, and networking to drive traffic. Regularly publish quality content that addresses your audience's needs.
🧐 Do I need to be an expert in a specific topic to start a blog?
No, but having knowledge or a genuine interest in your chosen niche helps. You can also learn and document your journey as you become more knowledgeable.
🤷♀️ Can I use WordPress for e-commerce?
Yes, with plugins like WooCommerce, you can turn your WordPress blog into a fully functional e-commerce site.
Quick Links
- Best WordPress Blog Themes For Bloggers
- Best WordPress Backup Plugins For Your WordPress Blogs
- Buy Web Hosting With A Free Domain Name For Your WordPress Blog
- The Cost of Starting a Self-Hosted WordPress Blog
Conclusion: How To Start A WordPress Blog and Make Money 2024
As we conclude our guide on How To Start a WordPress Blog in 15 minutes in 2024, you’ve taken a significant leap toward establishing your online presence.
The swift and straightforward process offered by WordPress empowers you to share your thoughts, creativity, or business with the world.
From selecting a domain to customizing your theme, you’ve laid the foundation for a digital space that reflects your identity.
Now armed with the knowledge to navigate WordPress efficiently, you’re ready to embark on your blogging journey.
So, seize this opportunity, explore the vast possibilities, and witness your WordPress blog flourish in 2024 and beyond.





Being new in blogging world I really needed a guide to help me out with the simple and basics of blogging. And your artcle really helped me achieve that. Thank you so much.