The e-commerce industry has experienced rapid growth in recent years. The demand for online shopping continues to grow, indicating that now may be the ideal time to start selling online.
Whether you’re looking to start a business or earn some extra cash, the e-commerce industry could be a great fit for you.
As someone with extensive experience in this game-changing industry, I’ve come to realize that you don’t need to spend a year or more creating your own online store. In fact, it can take just a matter of minutes.

After wasting time following traditional methods and creating an attractive store, I’ve learned that experience is often just the name we give to our mistakes.
However, with the right approach, e-commerce can be a powerful tool for success in the business world.
If you’re wondering how to create a thriving e-commerce website, you’ve come to the right place.
There are more options than ever for building an online store, and in this post, I’ll be featuring a guide on how to Create a Profitable eCommerce Store Within 15 Minutes. Let’s get started!
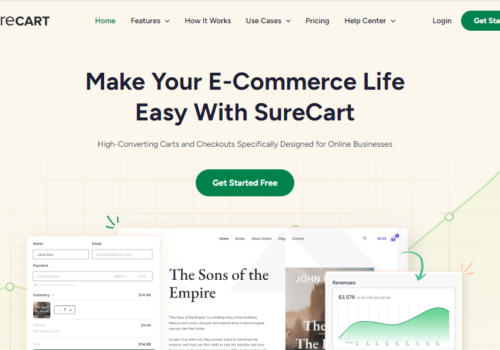
 Image Credit: Pixabay
Create a Profitable eCommerce Store Within 15 Minutes In 2024
It’s time to choose the perfect platform for your online store. The eCommerce industry is growing rapidly and presents a lot of opportunities for those who want to enter it.
However, with so many options available, it can be overwhelming to choose the right one.
It is essential to keep your requirements in mind when selecting a platform that caters to all your online store’s needs. Choosing the best platform is crucial to the success of your business, and I understand how much it can affect your revenue.
There are two options for creating a web store: coding everything by hand or using web design platforms like Shopify, Bigcommerce, WordPress, and many more.
However, coding requires a firm experience in HTML, PHP, MySQL, and other programming languages and can be time-consuming. Using web design platforms can be a more straightforward option, reducing the learning curve.
In this guide, I will share a detailed guide on how to create your eCommerce store using various platforms, including their plus points.
So, pick the best one that meets your store’s demands and get started on achieving that billion-dollar revenue.
Platforms To Create Profitable eCommerce Store In 15 Minutes
1) Let’s Get Started with Shopify
Shopify is a complete eCommerce solution that allows you to set up an online store to sell your goods.
It enables you to organize your products, customize your storefront, accept various payment methods, and track and respond to orders, all with the magic of a few clicks.

Shopify not only provides the facility to create an eCommerce store but also allows you to do dropshipping. This makes it the ideal choice for those who don’t have the inventory or funds to start an eCommerce store.
With drop shipping, you can resell products from websites like Oberlo and Aliexpress by simply creating an online store. This is a great option for those who want to start a business quickly and easily.
If you want to know how to create a store in a matter of minutes, then read on.
- Shopify e-Commerce Stores – How People Making 100000$ Per Month
- {Special} Shopify Plus & Shopify Coupon Codes April 2024: 50% OFF
Step 1- Create a Shopify Account
Creating an eCommerce store used to be a costly and complicated process that required a dedicated server and the services of a professional developer to customize it to your needs and maintain it.
The outcome would often be a passive and inefficient store.
However, platforms like Shopify have simplified the process, enabling you to create your eCommerce store quickly and easily. Shopify takes care of all the server setup and maintenance for you.
To get started, simply go to shopify.com and click on the “Get Started” button. Fill in the required fields and start building your website. As a new user, you can try the 14-day free trial.
You can choose to create an online shop or a brick-and-mortar store. Make sure to fill in your payment information to configure currencies and tax rates.
Step 2- Tap the settings and Add the products
When you tap on the “Settings” option, you will see different categories such as General, Payment, Checkout, and Terms. You can customize the settings according to your business needs and preferences.
While setting up, I suggest keeping delivery free of cost. This will attract more customers as they will not have to pay extra for shipping. You can set this as the default option in the settings.
Now that the settings are done, it’s time to add products. The “Add Product” page is user-friendly, just take some time to understand it. Fill in all the details, such as the title, product description, price, vendor (if applicable), etc. Try to add unique and interesting products.
If you are opting for dropshipping, Shopify makes it easy to get started and focus on generating revenue. Shopify provides an inbuilt option called Oberlo for dropshipping.
All you need to do is add the product and set the price according to your preferences.
With Shopify, you can enjoy the benefits of dropshipping and make a profit. Pexda is a reliable dropshipping tool that can help you find products to sell online.
Step 3- Customize the look and feel of your store.
Go to the option of ‘customize your online store’ and add the logo as well as the fancied colors you want to add.
The cherry on the cake is that there are a plethora of options available for you to pick the theme in the theme store. Select the one that justifies your business’s purpose and adds stars to your website.
Step 4- Setup the Domain
Did you know that it’s not necessary to add or buy a domain when using Shopify? That’s right! However, if you want to create a professional-looking store, it’s recommended that you add your own domain.
But don’t worry if you don’t have one yet; you can still use Shopify without it. To add a domain, simply click on the option in the dashboard and choose whether to add an existing domain or register a new one.
You’re only one step away from making your dream of having an online store come to life!
Step 5- Activate the Payment Method
To accept payments on your Shopify store, you can choose from several payment modes available on the dashboard.
These payment options include PayPal, as well as Shopify’s own payment process, which is the easiest one to set up.
Activating your necessary payment processors is a simple process that you can walk through step by step.
Once your payment options are set up, you can start accepting payments and watch your funds flow into your account.
With your payment options in place, you are all set to launch your store live. Congratulations! Your store is now up and running and ready to start making money.
Related Read:
- How to Build Shopify Stores in 7 Easy Steps (2024): 15 Mins Only
- How To Register a Domain Name For Your Business: Do’s and Don’ts
- Legit Tools To Find Winning Profitable Shopify Products April 2024
2) How to start with Bigcommerce
Having an online presence is a common practice nowadays. This is a no-brainer, isn’t it?
Selling products or services online is a lucrative option as it allows you to reach a wider audience, resulting in more sales.
There are numerous e-commerce solutions available, and Bigcommerce is one of them. It is an easy-to-use platform that does not require any coding knowledge.

Bigcommerce is one of the most popular eCommerce platforms. It’s a solution that enables users to have an up-and-running store functionality and more.
It also gives you a 15-day free trial, which allows you to have the feel before buying the subscription.
Let’s take a deep dive into the details.
Step 1- Sign-Up to Bigcommerce
Please take a look at the website Bigcommerce.com and explore its features. If you find it appealing, then it’s time to sign up.
Fill in all the required details, such as your name, email, etc. After that, click on the free trial button to get started.
Once you hit the trial button, it will prompt you to provide some additional details, and then you can continue building your customized store.
Step 2- Personalize Your Store
Let’s create a store that can make money. For this purpose, I am going to create an Art and Craft store.
First, choose a suitable name for your store and then update the settings by filling in the required details, such as address and phone number.
Don’t forget to select a theme from the Theme Marketplace that suits your eCommerce store category.
Once you have selected the theme, apply it to your store. To upload a logo, click on the Storefront and then upload the image file. If you don’t upload a logo, the text will appear in place of the logo.
Step 3- Add Products That Can Tempt Your Customers
Click on “Add Products” in Shopify, then include images, descriptions, prices, and other necessary details.
NOTE: The product description improves the probability of your product being found in the search.
When it comes to shipping, you have the option to determine the cost based on the size and weight of the products or to set a fixed price.
You can customize your store by working with a specific supplier or use an app from Bigcommerce to drop ship for multiple retailers.
The app provides Aliexpress dropshipping and allows you to import products directly from a list of thousands of options.
Finally, the last and most important step is…
Step 4- Setting Up Payment
If you’re running a trading business, it’s essential to have a variety of payment options available for your customers.
Limiting payment methods can turn away customers who prefer other payment modes, and this can have a negative impact on your business.
Fortunately, Bigcommerce makes it easy to offer a wide range of payment options to your customers. Simply click on the store setup button to access the payment options.
You can choose from three different payment types: Offline, Online, and digital Wallets, each with different alternatives.
Choose the payment methods that you trust and start accepting payments for your Arts and Crafts business.
NOTE: Don’t forget to set up the taxes.
With the payment gateway in place, you are all set to let customers into your store. Now, just punch the launch button and see your business grow at a rocket’s pace.
3) WordPress + WooCommerce – A fine platform
WordPress is the most popular platform that doesn’t need any introduction. It is the oldest and most trustworthy platform for users. You can also create an amazing and fully functional eCommerce store with it.
You just need to install a plugin. Yeah, WooCommerce is a plugin that you add to get the functions of an eCommerce store in WordPress.

The best part is it is free of cost, and you don’t need a license to use it. It also allows you to work with any design/theme you currently have on your WordPress site.
Let’s make another Online store to give you an idea.
Step 1- Get the desired Domain and Hosting
To set up an online store, you will need two things – a domain and web hosting. A domain is your business’s unique address, whereas web hosting is a remote computer that stores your web store.
It is recommended that you choose a domain name that you admire and opt for the .com extension, as having a website with the domain name mybusiness.com is expected to provide more authority by Google.
For web hosting, I suggest you choose the plans offered by Bluehost.com. Their plans are cheap and affordable.
Step 2- Time to Setup WordPress
You need to install WordPress on your hosting account. Though it sounds difficult, it is really not. All you need to do is go to the Bluehost user panel and install WordPress from there.
Just follow the simple steps as given in the instructions. Now let’s convert your WordPress store into a fully functional eCommerce store.
Step 3- The Most Crucial Part – Add WooCommerce Plugin
To set up WooCommerce, follow these simple steps. First, go to the Dashboard and click on the Plugin tab. You’ll see WooCommerce at the top – activate it.
Initially, you’ll be prompted to create different store pages such as shop, cart, checkout, and my account. Add the necessary information and proceed.
Next, set up the locale. You’ll need to provide basic information like your store’s location and preferred currency. Once you’ve added this information, click on continue.
The Shipping and Tax section is the most critical part of running an eCommerce store. You’ll be asked whether you plan to ship products and for tax-related information. Carefully add the necessary details.
The next step is to set up the Payment method. WooCommerce offers various solutions, including popular modes like Paypal and Stripe, which are considered highly secure payment methods.
There are other options available as well, such as offline gateways, bank transfers, and COD options.
Step 4- Now let’s add the Products
Adding products to your store is a simple process. Just select the picture of your product, upload it, and add a description. You can use various description columns to attract customers.
Add the price, specify the regular and offered prices, and provide tax-related data.
However, it’s important to note that WooCommerce doesn’t currently offer direct dropshipping options, which may make it difficult to rely solely on this platform for your business needs.
Step 5- Choose the best-fit theme
I added the products before applying the theme so that you can have a proper view of the theme and all its pages.
If you have already added a WordPress theme to your store, then it’s all set. But if you haven’t, WooCommerce provides the option to add themes as well.
You can also add extensions to your store, such as accounting, booking, or subscription extensions, to add more functionality without spending too much time. By adding these extensions, the functions will be added to your store.
Some of the best plugins to handle your tasks are Yoast SEO, MonsterInsights, and Contact Form 7. These plugins will help you manage tedious tasks such as managing SEO, analyzing analytics, and more.
The process of creating your eCommerce store with WordPress is not too complex. You are good to go with your online store. All you need to do is pay for the hosting in this case.
FAQs
🚀 What platform should I use to set up my store quickly?
Consider platforms like Shopify, WooCommerce, or BigCommerce. They offer user-friendly interfaces and quick setup options.
💳 Can I set up payment options easily?
Yes, most platforms integrate seamlessly with major payment gateways like PayPal, Stripe, and credit card processors.
🤔 How important is the design of my store?
Very! A clean, professional design improves customer trust and experience. Utilize built-in templates and customization options.
🔍 Should I worry about SEO at this stage?
Basic SEO setup is crucial. Ensure your product titles, descriptions, and images are optimized for search engines.
⚙️ Is it possible to automate some processes?
Absolutely! Use tools for inventory management, email responses, and social media scheduling to save time.
📱 How do I ensure my store is mobile-friendly?
Choose themes and templates that are responsive and test your site on various devices.
Quick Links:
Conclusion: How To Launch & Create a Profitable eCommerce Store Within 15 Mins 2024
I have provided a guide to introduce you to various platforms that allow you to create your own online store quickly and easily, without the need to learn any coding.
The best platform for you depends on factors like scalability, ease of use, and other requirements specific to your business. By choosing the right platform, you can free up valuable time and automate many business processes.
These platforms come with a comprehensive marketplace where you can choose from a range of free and paid apps that can add extra functionality to your eCommerce store.
They are robust and have amazing tools to help grow your business. However, it’s important to remember that creating an eCommerce store is just the first step.
You need to take it to the next level to achieve your billion-dollar dream.